

In this post
- Exploring 7 Knitted Cute Cat Free Patterns for Every Crafter
- How to Choose a Project for Your Skill Level and Yarn Stash
- Classic and Cozy Feline Friends
- Playful and Portable Kitty Designs
- Expressive and Unique Characters
- Tips for Knitting and Assembling Toys Faster
- Frequently Asked Questions
- Bring Your Knitted Cat Collection to Life
Handmade toys bring genuine warmth to playtime, and searching for 7 Knitted Cute Cat Free Patterns gives you the perfect excuse to turn simple yarn into beloved companions. If you want to make a toy for kids, this intermediate-level project is a practical choice. Each project in this collection produces a finished toy that measures approximately 7 in (18 cm) tall, requiring about 4-6 hours of focused knitting time. By using worsted weight (4) yarn paired with 3.5 mm (US 4) knitting needles, you create a dense, firm fabric that keeps soft stuffing inside. You will learn how to shape clean contours using basic increases and decreases, master precise toy assembly using the mattress stitch, and add safe, embroidered facial features that make each kitten truly unique.
Exploring 7 Knitted Cute Cat Free Patterns for Every Crafter
Knitting three-dimensional toys is a helpful way to develop your structural shaping skills while creating soft keepsakes. Working with 7 Knitted Cute Cat Free Patterns allows you to explore multiple garment-knitting principles on a smaller scale, including working in the round, grafting seams, and managing colorwork tension. Toy knitting requires denser fabric than standard sweaters or blankets, which prevents polyfill from showing through the stitches when the piece is firmly stuffed.
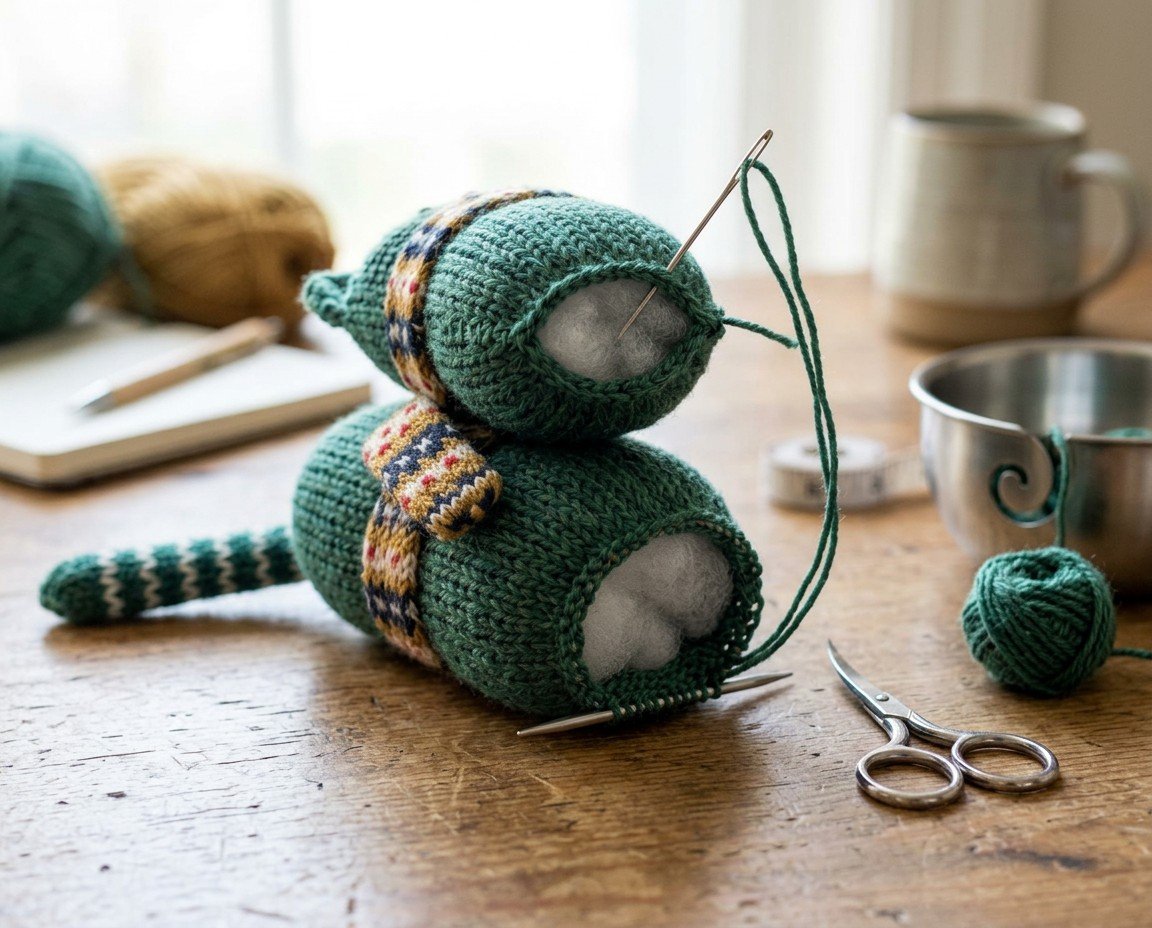
Every pattern featured here is scaled to roughly 7 in (18 cm) tall, making them portable and comfortable for small hands to hold. These toys use simple shaping techniques like knit two together (k2tog) and make one (M1) increases to form rounded heads, tapered bodies, and neat pointed ears. Because they are designed specifically for young children, all facial features rely on secure hand embroidery using black and pink floss, avoiding hard plastic parts.
| Cat Style | Main Stitch Pattern | Key Feature | Estimated Time |
|---|---|---|---|
| Classic Green Cat | Stockinette stitch | Separate Fair Isle scarf | 4-6 hours |
| Vintage Style Cat | Garter stitch | Squishy texture, flat construction | 4-5 hours |
| Striped Tabby Cat | Striped stockinette | Two-row color jogless stripes | 5-6 hours |
| Mini Pocket Cat | Stockinette stitch | Seamless one-piece body and head | 4 hours |
| Sleepy Eyed Kitten | Stockinette stitch | Curved backstitch sleepy eyes | 4-5 hours |
| Fat Round Kitty | Stockinette stitch | Wide base, low center of gravity | 4-5 hours |
| Long-Legged Cat Doll | Stockinette stitch | Attached tubular limbs | 5-6 hours |
How to Choose a Project for Your Skill Level and Yarn Stash
Selecting the right design from this collection begins with matching your yarn stash to the structural needs of a knitted stuffed toy. A medium worsted weight (4) yarn in wool or acrylic provides a balanced mix of elasticity and stitch definition. Wool offers natural bounce that hides minor tension inconsistencies, while acrylic offers easy washing for heavily loved children’s toys.
Achieving the correct gauge is critical when knitting toys. For these patterns, your gauge should be 20 stitches and 28 rows = 4 in (10 cm) in stockinette stitch worked on 3.5 mm (US 4) knitting needles. Working on needles that are one to two sizes smaller than the yarn band recommends creates a tight weave. If your gauge is too loose, polyfill will poke through the gaps; if it is too tight, your hands will fatigue quickly during the 4-6 hours of knitting.
Pro tip: Always knit a quick 3 in (7.6 cm) test swatch in stockinette stitch. If you can push a pencil tip through the fabric without resistance, drop down to a 3.25 mm (US 3) needle to ensure your toy fabric remains completely opaque when stuffed.
Classic and Cozy Feline Friends
Traditional toy designs focus on clean lines and timeless color palettes that highlight thoughtful knitting techniques.
-
Classic Green Knitted Cat with Fair Isle Scarf
This design features a solid dark green body worked in smooth stockinette stitch with small pointed ears, a rounded body, and a striped hanging tail. The standout accessory is a separate Fair Isle scarf worked in fingering or sport weight yarn using mustard, navy, white, and red scraps. The intermediate difficulty stems from the tiny stranded colorwork on the scarf, which requires consistent float tension across small circumferences. Keep your floats loose so the scarf drapes neatly around the cat’s 7 in (18 cm) frame.
-
Vintage Style Garter Stitch Cat
Constructed entirely in garter stitch, this cat has a squishy, flexible texture that holds up well to rough handling. The ridges of garter stitch naturally hide row transitions and make counting rows simple when shaping the body. This pattern is worked flat and seamed using mattress stitch along the garter ridges. Leave longer yarn tails when casting on and binding off so you have matching yarn ready for seaming.
Playful and Portable Kitty Designs
Color changes and compact proportions bring added personality to your knitted toy collection while efficiently using leftover skeins.
-
Striped Tabby Knitted Cat Toy
The striped tabby utilizes alternating two-row stripes of worsted weight yarn across the body and tail. To avoid unsightly jogs when working the stripes in the round, lift the right leg of the stitch below the first stitch of the second stripe round onto your left needle, then knit the two stitches together. This simple technique creates seamless, continuous rings around the torso, giving your 7 in (18 cm) tabby a polished finish without distinct color breaks.
-
Mini Pocket-Sized Knitted Cat
Designed with integrated shaping, this pattern knits the legs, body, and head in one continuous piece to minimize final assembly. It is an option if you want to complete a project in the lower range of the 4-6 hours timeframe. Because the entire body is one piece, you must pause to stuff the lower limbs and base firmly before narrowing the stitches for the neck decrease row.
Pro tip: When working small tubular pieces like cat tails or legs on double-pointed needles, distribute your stitches across three needles instead of four. This reduces the number of needle transitions per round, minimizing the risk of loose tension or laddering along the seams.
Expressive and Unique Characters
Subtle adjustments to facial embroidery and body proportions allow you to create distinct feline personalities with the same basic yardage.
-
Sleepy Eyed Knitted Kitten
Instead of traditional open eyes, this kitten features downward-curved sleeping eyes embroidered with black floss using a fine backstitch. The relaxed expression pairs beautifully with a slightly softer stuffing density in the upper torso. To ensure symmetrical curves, insert two sewing pins into the head as visual landmarks before stitching the eyes across two adjacent knitted stitches.
-
Fat Round Knitted Kitty
Featuring rapid increases right above the cast-on edge, this chubby kitty design creates a broad, weighted base that sits upright on a shelf or bed. It requires the full 1 oz (30 g) of polyfill stuffing, distributed densely at the bottom and tapered toward the ears. When working rapid increases on 3.5 mm (US 4) needles, use the M1L (make one left) and M1R (make one right) lifted increases to prevent eyelet holes from forming along the lower belly.
-
Long-Legged Knitted Cat Doll
This character combines a compact 3 in (7.6 cm) torso with elongated, narrow limbs, bringing the total length to the standard 7 in (18 cm) height. The limbs are knit as narrow 8-stitch tubes that require light stuffing only halfway up the length. Leaving the upper joints empty allows the arms and legs to flop naturally, making the doll easy for toddlers to carry and pose.
Tips for Knitting and Assembling Toys Faster
Streamlining your finishing process ensures your handmade cats look symmetrical, feel durable, and come together without unnecessary frustration.
- Knit Pieces in Pairs: Work symmetrical components like ears and limbs at the same time using two separate balls of yarn on one long circular needle. This guarantees identical row counts, equal gauge, and matching stitch tension across both pieces.
- Stuff Gradually in Small Tufts: Avoid stuffing your toy with one large clump of polyfill. Instead, pull apart small tufts of stuffing roughly the size of a cotton ball. Push them into the corners and edges first using the eraser end of a wooden pencil, filling the piece evenly to prevent lumpy or hollow spots.
- Secure Seams with Mattress Stitch: Align your edge stitches with right sides facing out. Insert your yarn needle under the running bars between the edge stitch and the first interior stitch, alternating back and forth between sides every two rows before pulling the working yarn snug.
- Embroider Details Before Sealing: Stitch the black eyes, whiskers, and pink nose while the top or bottom of the head is still partially open. This allows you to knot and weave your embroidery floss securely inside the toy cavity where tiny fingers cannot pull it loose.
Pro tip: Keep a ruler handy to check your work against the finished dimensions. For items intended for small hands, ensure all attached pieces like ears and tails pass a firm pull test to confirm they are safely anchored to the main body fabric.
Frequently Asked Questions
What yarn is recommended for knitting toy cats?
Worsted weight (4) yarn in acrylic or wool works well because it provides clear stitch definition. Acrylic is machine washable for everyday children’s toys, while wool offers natural elasticity that creates neat, smooth shaping across increases and decreases.
Are these 7 Knitted Cute Cat Free Patterns suitable for beginners?
These patterns are rated at an intermediate skill level because they involve working in the round on small circumferences, shaping with paired increases and decreases, and seaming small parts. However, an adventurous beginner with solid knit and purl fundamentals can successfully complete them with careful row counting.
How much stuffing do I need for a 7-inch knitted cat?
A standard 7 in (18 cm) knitted cat requires approximately 1 oz (30 g) of polyfill stuffing. Distributing this amount in small, firm pinches ensures the toy holds its shape over time without stretching open the knit stitches.
Can I use safety eyes instead of embroidery?
Hand-embroidered facial features using black and pink floss are used for all facial details on these toys.
Bring Your Knitted Cat Collection to Life
Exploring these 7 Knitted Cute Cat Free Patterns gives you a versatile set of projects that transform simple worsted yarn into treasured handmade gifts. By maintaining a gauge of 20 stitches by 28 rows on 3.5 mm (US 4) needles, your finished toy will measure approximately 7 in (18 cm) tall. As a final tip, always weave your seam tails deep into the center of the polyfill stuffing before snipping to keep raw ends permanently hidden. Cast on your favorite feline design today and enjoy every stitch of the making process.

