

In this post
- At a Glance
- Why This Project Works and What You Will Learn
- Materials and Tools Needed
- Choosing the Right Yarn for Handmade Knitted Socks with Heart Pattern
- Cuff and Leg Construction
- Heel Flap and Heel Turn
- Gusset and Foot Shaping
- Knitting Pattern Instructions
- Troubleshooting Common Sock Knitting Issues
- Frequently Asked Questions
- Achieving the Perfect Hand-Knit Pair
Knitting your own footwear is a practical and satisfying milestone in the craft. Making a pair of Handmade Knitted Socks with Heart Pattern gives you the opportunity to master essential sock architecture while working a clean, contrasting colorwork design. If you are looking to expand past plain socks into stranded motifs, this intermediate project combines classic fit with a colorwork motif. You will work a top-down construction featuring a comfortable ribbed cuff, a smooth stockinette leg with a centered back motif, a durable heel flap and gusset, and a seamless Kitchener toe closure. Using fingering weight yarn, you can create a cozy, tailored pair designed to fit an Adult Medium (Women’s US shoe size 6-9) across 10-15 hours of focused knitting.
At a Glance
Before casting on, review the primary specifications and requirements for this sock project.
| Skill Level | Intermediate |
|---|---|
| Time Commitment | 10-15 hours |
| Finished Size | Adult Medium / Women’s US shoe size 6-9 (8-9 in / 20-23 cm foot circumference) |
| Base Gauge | 32 sts x 44 rounds = 4 in / 10 cm in stockinette stitch |
| Key Construction | Top-down in the round, stranded colorwork motif, heel flap and gusset, grafted toe |
Why This Project Works and What You Will Learn
A well-constructed hand-knitted sock relies on balanced tension and anatomical shaping. This design pairs a traditional heel flap and gusset with a centered colorwork motif. The heel flap structure uses slipped stitches to create an extra-dense fabric across the back of the heel, which protects the area most susceptible to friction and shoe wear. The gusset shaping allows you to customize the instep depth, ensuring the sock slides easily over the heel arch without pulling the leg fabric downward or creating excess bulk under the arch.
Working the stranded heart on the back of the leg introduces isolated colorwork management in the round. Because the dark brown heart is centered over the back 30 stitches while the front 30 stitches remain in the main color, you will practice catching floats and keeping your yarn tension loose enough to prevent puckering. You will also learn to execute clean, left- and right-leaning decreases (ssk and k2tog) along the gusset and toe, culminating in the seamless Kitchener stitch graft.
Materials and Tools Needed
Gather the exact yarn weights, needles, and notions required for this project.
- Main Color (MC): Fingering weight wool/alpaca blend yarn (70% wool, 30% alpaca; 400 yds / 365 m per 100g skein) in Oatmeal / Light Grey Heather, 1 skein (100g / 400 yds)
- Contrasting Color (CC): Fingering weight 100% wool yarn (200 yds / 183 m per 50g skein) in Dark Brown, 1 skein (20g / 80 yds used)
- Needles: 2.5 mm (US 1.5) circular needle (32 in / 80 cm for magic loop) or set of 5 double-pointed needles (DPNs)
- Notions: 3 stitch markers, tapestry/yarn needle, scissors, tape measure
Choosing the Right Yarn for Handmade Knitted Socks with Heart Pattern
Sock yarn must withstand significant friction, moisture, and stretching. For the main color of your Handmade Knitted Socks with Heart Pattern, a fingering weight wool-and-alpaca blend provides warmth, softness, and a subtle fuzzy halo that softens the transition between rounds. Wool provides the natural crimp and elasticity needed for the sock to hug the foot and retain its shape after repeated wear, while alpaca adds gentle thermal insulation.
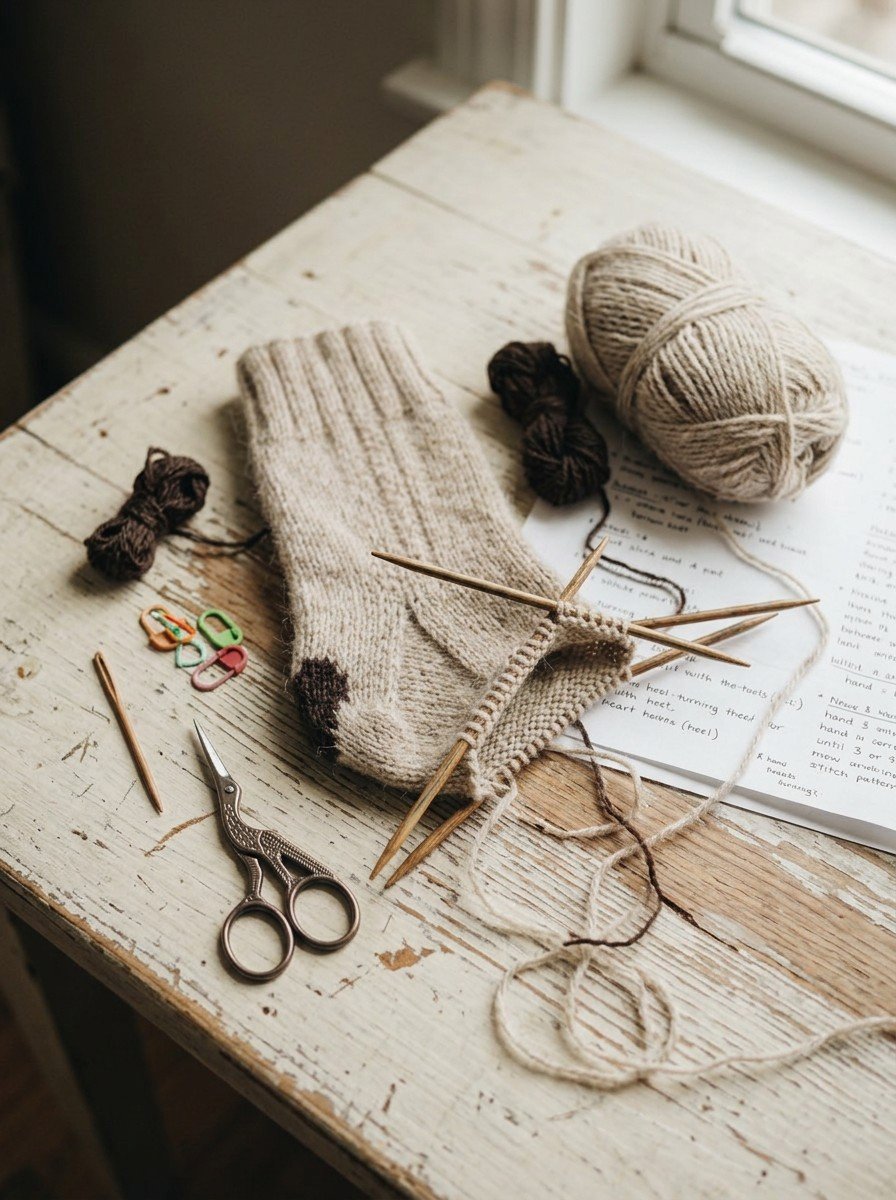
The heart motif requires a smooth, fingering weight 100% wool in dark brown. Using a non-fuzzy, high-contrast yarn for the motif ensures the edges of the heart remain crisp and defined against the heathered base. Ensure both yarns are true fingering weight (yielding 32 stitches per 4 inches / 10 cm on 2.5 mm needles) so that the colorwork section does not bulge or disrupt the uniform thickness of the leg fabric.
Pro tip: When working isolated colorwork across half a round, carry your floats loosely across the back of the working stitches. Spread the active stitches wide across your right-hand needle before catching a float or changing colors to keep the fabric elastic enough to pull over the heel.
Cuff and Leg Construction
The knitting process begins at the top cuff, using 60 stitches to establish an elastic opening that stays upright on the leg.
- Cast On: Using the 2.5 mm needles and Main Color (MC), cast on 60 stitches using the German Twisted Cast-On for maximum edge elasticity. Join in the round without twisting, and place a marker for the beginning of the round (BOR).
- Work the Ribbing: Work in K2, P2 ribbing for 16 rounds. This creates a secure, springy band that prevents the sock from slipping down the calf.
- Begin the Stockinette Leg: Knit 10 rounds plain in stockinette stitch with MC to create a smooth transition below the ribbed cuff.
- Incorporate the Heart Motif: Join the Contrasting Color (CC) on Round 27. Follow the written stitch counts to work the 12-round heart motif over the first 30 stitches of the round (the back of the leg), keeping the remaining 30 instep stitches in plain MC stockinette.
- Finish the Lower Leg: Cut CC leaving a 6 in (15 cm) tail, and knit 10 rounds plain in MC to reach the start of the heel flap.
Heel Flap and Heel Turn
After completing the leg, you will divide the stitches to form the heel flap across the back of the sock.
- Set Up the Heel Flap: Work back and forth in rows over the first 30 stitches (the heel stitches), placing the 30 instep stitches on hold on your spare needle cable or DPNs.
- Work the Reinforced Pattern: Work 30 rows in the slipped-stitch heel pattern (*sl 1, k1* on RS rows; sl 1, purl across on WS rows). This creates a cushioned, heavy-duty fabric that resists abrasive wear from shoes.
- Turn the Heel: Shape the bottom curve of the heel using short rows. You will work across the center stitches, execute decreases (ssk on right-side rows, p2tog on wrong-side rows) across the gaps created by turning, and work until 18 heel stitches remain.
Gusset and Foot Shaping
Once the heel cup is turned, you will pick up stitches along the sides of the flap to reconnect the heel with the instep.
- Gusset Setup: Knit halfway across the 18 heel stitches (9 sts) to set your new beginning of the round at the center of the sole. Knit the remaining 9 heel stitches, pick up and knit 15 stitches along the first edge of the heel flap, work across the 30 held instep stitches, pick up and knit 15 stitches along the second flap edge, and knit the last 9 heel stitches (78 sts total).
- Work Gusset Decreases: Alternate decrease rounds with plain knit rounds. On decrease rounds, k2tog 3 stitches before the instep, knit the 30 instep stitches, then ssk 1 stitch after the instep.
- Knit the Foot: Continue the decrease cycle until you return to the original 60-stitch count (30 sole stitches, 30 instep stitches). Knit plain in the round until the foot measures 7.25 in (18.4 cm) from the back of the heel, or approximately 2 in (5 cm) short of your total foot length.
Pro tip: When picking up stitches along the heel flap edges, insert your needle under both loops of the slipped edge stitch plus the small running bar behind it. This closes the gap completely and prevents holes at the instep corners.
Knitting Pattern Instructions
Follow the complete row-by-row and round-by-round directions below to knit both socks.
Finished size: 7.5 in (19 cm) foot circumference, 9.25 in (23.5 cm) foot length from back of heel to toe; fits Adult Medium foot circumference 8-9 in (20-23 cm), US Women’s shoe size 6-9
Gauge: 32 sts x 44 rnds = 4 x 4 in (10 x 10 cm) in stockinette stitch worked in the round on 2.5 mm (US 1.5) needles
Abbreviations (US terms)
| Abbreviation | Meaning |
|---|---|
| BOR | beginning of round |
| CC | contrasting color (Dark Brown) |
| k | knit |
| k2tog | knit 2 stitches together (right-leaning decrease) |
| MC | main color (Oatmeal) |
| p | purl |
| p2tog | purl 2 stitches together |
| pm | place marker |
| rep | repeat |
| RS | right side |
| sl 1 | slip 1 stitch purlwise with yarn in back on RS, yarn in front on WS |
| sm | slip marker |
| ssk | slip 2 stitches knitwise one at a time, insert left needle into fronts and knit together (left-leaning decrease) |
| WS | wrong side |
| st | stitch |
| sts | stitches |
| rnd | round |
| rnds | rounds |
| tog | together |
Sizing
| Size | Foot Circumference | Sock Circumference | Foot Length | Total Cast-On |
|---|---|---|---|---|
| Adult Medium | 8-9 in (20-23 cm) | 7.5 in (19 cm) | 9.25 in (23.5 cm) | 60 sts |
Pattern Notes
- Socks are worked from the cuff down in the round using either the Magic Loop method or double-pointed needles (DPNs).
- Stitches 1-30 form the back of the leg / sole (Needle 1), and stitches 31-60 form the front of the leg / instep (Needle 2).
- The Dark Brown heart motif is worked using stranded colorwork centered on the back 30 stitches of the leg. Carry unused floats loosely across the WS of the work (catching floats longer than 5 stitches).
- Slip all slipped stitches purlwise with yarn held to the wrong side of the work unless otherwise stated.
- The 15-stitch Heart Chart (worked on back sts 8 to 22) is charted row-by-row directly in the leg section instructions.
Cuff and Leg (MC and CC)
- Cast On: With MC and 2.5 mm needles, cast on 60 sts using the German Twisted Cast-On (or standard Long-Tail Cast-On). Join in the round, being careful not to twist stitches, and pm for BOR (60 sts).
- Rnds 1-16: *K2, p2; rep from * around (60 sts).
- Rnds 17-26: K all 60 sts around with MC (60 sts).
- Rnd 27: (Heart Rnd 1): Join CC. With MC k14, with CC k2, with MC k14; with MC k30 (60 sts).
- Rnd 28: (Heart Rnd 2): With MC k13, with CC k4, with MC k13; with MC k30 (60 sts).
- Rnd 29: (Heart Rnd 3): With MC k12, with CC k6, with MC k12; with MC k30 (60 sts).
- Rnd 30: (Heart Rnd 4): With MC k11, with CC k8, with MC k11; with MC k30 (60 sts).
- Rnd 31: (Heart Rnd 5): With MC k10, with CC k10, with MC k10; with MC k30 (60 sts).
- Rnd 32: (Heart Rnd 6): With MC k9, with CC k12, with MC k9; with MC k30 (60 sts).
- Rnd 33: (Heart Rnd 7): With MC k8, with CC k14, with MC k8; with MC k30 (60 sts).
- Rnd 34: (Heart Rnd 8): With MC k8, with CC k14, with MC k8; with MC k30 (60 sts).
- Rnd 35: (Heart Rnd 9): With MC k8, with CC k14, with MC k8; with MC k30 (60 sts).
- Rnd 36: (Heart Rnd 10): With MC k8, with CC k6, with MC k2, with CC k6, with MC k8; with MC k30 (60 sts).
- Rnd 37: (Heart Rnd 11): With MC k9, with CC k4, with MC k4, with CC k4, with MC k9; with MC k30 (60 sts).
- Rnd 38: (Heart Rnd 12): With MC k10, with CC k2, with MC k6, with CC k2, with MC k10; with MC k30. Cut CC, leaving a 6 in (15 cm) tail to weave in (60 sts).
- Rnds 39-48: With MC, k all 60 sts around (60 sts).
Heel Flap and Heel Turn (MC)
- Heel Flap Row 1 (RS): With MC, *sl 1, k1; rep from * over the next 30 heel sts, turn leaving remaining 30 instep sts on hold (30 heel sts).
- Heel Flap Row 2 (WS): Sl 1, p29, turn (30 sts).
- Heel Flap Rows 3-30: Rep Rows 1 and 2 fourteen more times, ending after a WS row (30 sts).
- Heel Turn Row 1 (RS): Sl 1, k16, ssk, k1, turn (19 sts remaining on working needle).
- Heel Turn Row 2 (WS): Sl 1, p5, p2tog, p1, turn (8 sts remaining on working needle).
- Heel Turn Row 3 (RS): Sl 1, k to 1 st before gap (6 sts), ssk across gap, k1, turn (9 sts on working needle).
- Heel Turn Row 4 (WS): Sl 1, p to 1 st before gap (7 sts), p2tog across gap, p1, turn (10 sts on working needle).
- Heel Turn Row 5 (RS): Sl 1, k to 1 st before gap (8 sts), ssk across gap, k1, turn (11 sts on working needle).
- Heel Turn Row 6 (WS): Sl 1, p to 1 st before gap (9 sts), p2tog across gap, p1, turn (12 sts on working needle).
- Heel Turn Row 7 (RS): Sl 1, k to 1 st before gap (10 sts), ssk across gap, k1, turn (13 sts on working needle).
- Heel Turn Row 8 (WS): Sl 1, p to 1 st before gap (11 sts), p2tog across gap, p1, turn (14 sts on working needle).
- Heel Turn Row 9 (RS): Sl 1, k to 1 st before gap (12 sts), ssk across gap, k1, turn (15 sts on working needle).
- Heel Turn Row 10 (WS): Sl 1, p to 1 st before gap (13 sts), p2tog across gap, p1, turn (16 sts on working needle).
- Heel Turn Row 11 (RS): Sl 1, k to 1 st before gap (14 sts), ssk across gap, k1, turn (17 sts on working needle).
- Heel Turn Row 12 (WS): Sl 1, p to 1 st before gap (15 sts), p2tog across gap, p1, turn (18 total heel sts remain).
Gusset and Foot (MC)
- Gusset Setup Rnd: K9 sts to center of heel (pm for new BOR); k9 heel sts, pick up and k15 sts along side of heel flap, pm; k30 instep sts, pm; pick up and k15 sts along second side of heel flap, k9 heel sts to BOR (78 sts total: 48 sole/gusset sts, 30 instep sts).
- Gusset Rnd 1 (Decrease): K to 3 sts before instep marker, k2tog, k1, sm; k30 instep sts, sm; k1, ssk, k to BOR (76 sts).
- Gusset Rnd 2 (Plain): K all 76 sts around (76 sts).
- Gusset Rnds 3-18: Rep Gusset Rnds 1 and 2 eight more times (60 sts total: 30 sole sts, 30 instep sts).
- Foot Rnds: Remove gusset markers. K all 60 sts in every rnd until foot measures 7.25 in (18.4 cm) from back of heel turn, or approx 2 in (5 cm) less than desired total foot length (60 sts).
Toe (MC)
- Toe Setup Rnd: K15 to start of sole, pm (new BOR is at right edge of sole); sole has 30 sts, instep has 30 sts (60 sts).
- Toe Rnd 1 (Decrease): *K1, ssk, k to 3 sts before next marker, k2tog, k1, sm; rep from * once more over instep sts (56 sts).
- Toe Rnd 2 (Plain): K all 56 sts around (56 sts).
- Toe Rnds 3-14: Rep Toe Rnds 1 and 2 six more times (32 sts total: 16 sole sts, 16 instep sts).
- Toe Rnds 15-17: Rep Toe Rnd 1 three times consecutively without plain rounds (20 sts total: 10 sole sts, 10 instep sts).
Finishing
- Align remaining 20 sts evenly on 2 parallel needles (10 sole sts on Needle 1, 10 instep sts on Needle 2).
- Cut MC yarn leaving an 18 in (46 cm) tail. Thread tail onto tapestry needle.
- Graft the toe stitches together using Kitchener stitch: *Insert tapestry needle into front st purlwise, leave st on needle; insert into back st knitwise, leave st on needle; insert into front st knitwise, slip st off needle; insert into front st purlwise, leave on needle; insert into back st purlwise, slip st off needle; insert into back st knitwise, leave on needle; rep from * until all sts are grafted.
- Draw yarn tail to the inside of the sock and pull gently to close corner tension.
- Weave in all MC and CC ends on the WS following the path of the stitches.
- Repeat all steps to knit the second sock identical to the first.
Troubleshooting Common Sock Knitting Issues
Reference this guide to resolve typical tension, fit, and structural problems encountered during sock construction.
| Problem | Underlying Cause | Correction |
|---|---|---|
| Heart motif fabric puckers or pulls tight | Contrasting color floats were carried too tightly across the back of the work. | Space out the stitches on the right needle before catching a float or changing colors. Wet blocking on a blocker will also help relax moderate tightness. |
| Gaps or holes appear at the top corners of the heel gusset | Loose tension when transitioning between the picked-up flap stitches and the held instep stitches. | Pick up an extra stitch in the corner gap on the setup round, then knit it together with the adjacent stitch on the first decrease round. |
| Vertical lines or “ladders” between needles | Slack tension on the first two stitches when switching between DPNs or magic loop sides. | Pull the second stitch on the new needle firmly to lock the join into place. |
| Kitchener toe graft has “ears” or pointed corners | Uneven tension applied to the initial setup stitches or final tail knotting. | Maintain the same tension as the surrounding knitted stitches, and weave the tail into the wrong-side corner loop rather than knotting it tight. |
Frequently Asked Questions
What yarn weight is best for Handmade Knitted Socks with Heart Pattern?
A standard fingering weight wool or wool-blend yarn is used for this project. Fingering weight yarn produces a dense, durable fabric at 32 stitches per 4 inches (10 cm) that fits comfortably inside standard footwear without adding excessive bulk.
How do I prevent floats from pulling too tight during the heart colorwork?
Spread the working stitches evenly along the right needle before carrying the resting strand across the back. Keeping the stitches relaxed and open as you knit ensures the floats retain enough slack to stretch around the ankle when putting the sock on.
Can I use double-pointed needles instead of the magic loop method?
Yes, you can work this entire pattern using a set of five 2.5 mm double-pointed needles (DPNs). Simply divide the 60 cast-on stitches across four needles (15 stitches per needle) and use the fifth needle as your working needle, keeping the heart motif centered across needles 1 and 2.
How do I adjust the sock size for a larger foot?
This specific pattern is written solely for an Adult Medium (fits foot circumference 8-9 in / 20-23 cm). Other sizes are not covered by this pattern. You can, however, adjust the foot length by knitting additional plain stockinette rounds before beginning the toe decreases.
Achieving the Perfect Hand-Knit Pair
Completing a pair of Handmade Knitted Socks with Heart Pattern provides a functional accessory that highlights intermediate knitting techniques. The combination of an elastic cuff, custom-shaped heel flap, and smooth colorwork creates footwear that is as comfortable as it is durable. Remember to always take time to wet block your finished pair on sock blockers to fully open the stitch definition and smooth out the heart motif.

