

In this post
- At a Glance: Knitted Fingerless Gloves Pattern
- Why You Will Love This Knitting Project
- Materials and Tools Needed
- Understanding Gauge and Sizing
- Stitch Abbreviations and Key Techniques
- Step-by-Step Knitted Fingerless Gloves Pattern Instructions
- Troubleshooting Common Cable and Sizing Issues
- Frequently Asked Questions
- Wrap Up Your Handmade Glove Project
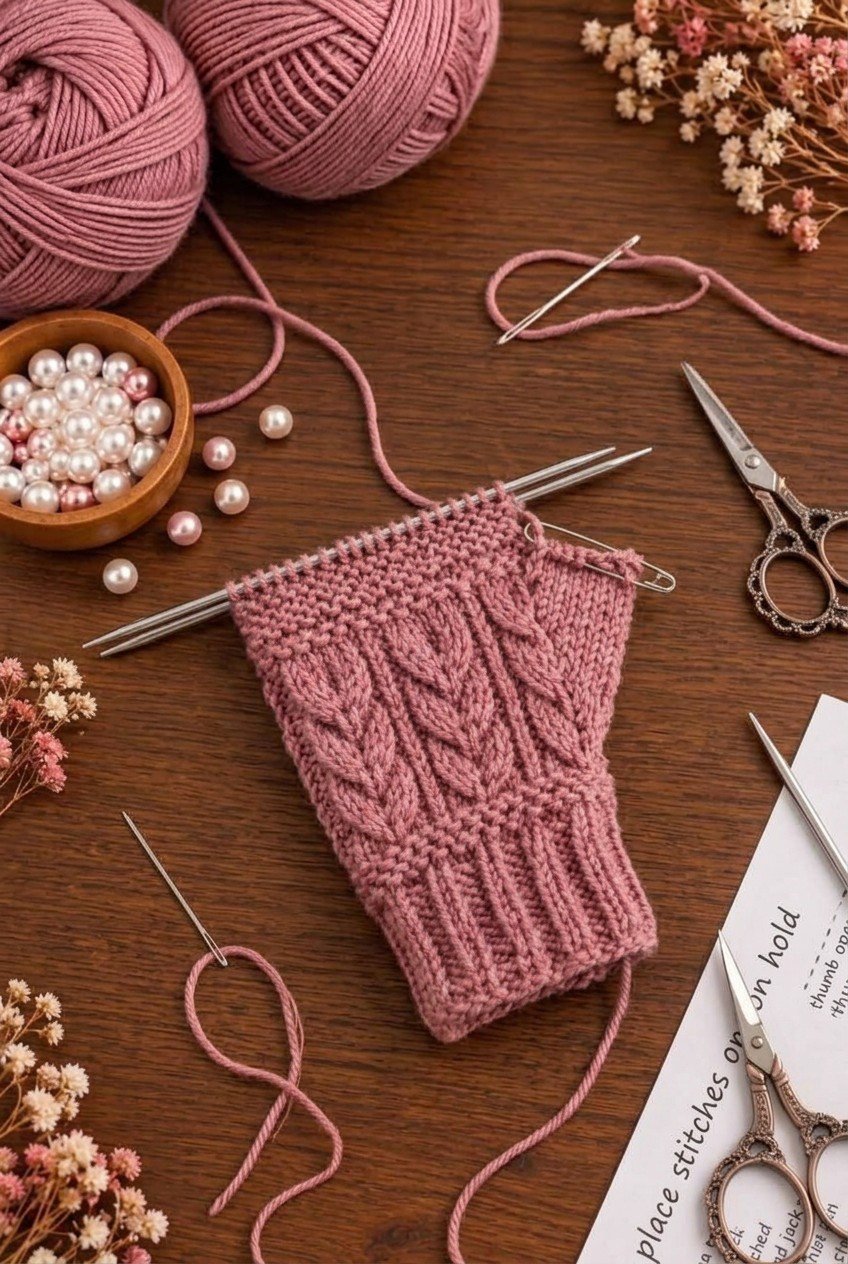
Learning how to work a Knitted Fingerless Gloves Pattern gives you the perfect balance of cozy warmth and finger freedom for everyday tasks like typing, driving, or texting. This intermediate knitting project features a rich dusty pink colorway, classic 2×2 ribbed edges, and a bold central vertical cable flanked by textured stitches. Working small accessories in the round is a fast, satisfying way to master basic cable crosses and seamless thumb openings without getting overwhelmed by large sweater panels. In this complete tutorial, you will discover how to create a tailored pair of mitts that measure 7 in (18 cm) long and 3.5 in (9 cm) wide flat, fitting an adult medium hand circumference of 7-8 in (18-20 cm). Grab your needles and wool yarn, and let us work through each step of this practical accessory together.
At a Glance: Knitted Fingerless Gloves Pattern
Before casting on your stitches, review the essential technical specifications for this accessory project to ensure you have the correct yarn weight, needle sizes, and time set aside.
| Skill Level | Intermediate |
|---|---|
| Time to Complete | 4-6 hours |
| Finished Size | Length 7 in (18 cm), Width 3.5 in (9 cm) flat (Fits hand circumference 7-8 in / 18-20 cm) |
| Yarn Weight | Worsted weight (#4 medium wool or wool-blend) |
| Needle Size | US 7 (4.5 mm) double-pointed needles or 32 in (81 cm) circular needle for magic loop |
| Gauge | 20 sts x 28 rows = 4 in / 10 cm in stockinette stitch |
Why You Will Love This Knitting Project
Working this textured glove design allows you to practice essential garment-knitting skills on a small, portable canvas. The structure uses a snug 2×2 ribbing at both the wrist and the fingers to keep cold drafts out while providing elastic recovery that holds its shape through daily wear.
The central vertical cable panel runs along the back of the hand, adding a defined visual line. Because the palm side is worked in smooth stockinette, the gloves feel comfortable against your skin and provide a flexible grip without unnecessary bulk.
Worsted weight wool yarn offers both warmth and crisp stitch definition, making every twist of the cable pop against the textured background. You can complete the entire pair in 4-6 hours, making them a practical project for gift knitting or your own wardrobe.
Pro tip: Using a plied 100% wool yarn provides natural elasticity and spring, which helps the 2×2 ribbing cling comfortably to your wrists without bagging out over time.
Materials and Tools Needed
Gathering high-quality tools and the correct yarn weight ensures your finished mitts match the pattern dimensions accurately.
- Worsted weight (medium #4) wool yarn in dusty pink (100% Peruvian Highland Wool; 175 yds / 160 m per 100 g skein): 1 skein (approx. 150 yds / 137 m used)
- US 7 (4.5 mm) double-pointed needles (set of 4 or 5) or 32 in (81 cm) circular needle for magic loop
- Cable needle (CN)
- Stitch markers (2)
- Waste yarn for holding thumb stitches (approx. 12 in / 30 cm)
- Tapestry needle
- Scissors
Understanding Gauge and Sizing
Achieving the correct gauge of 20 stitches and 28 rows per 4 in (10 cm) in stockinette stitch on US 7 (4.5 mm) needles is critical to ensuring your mitts fit an adult medium hand of 7-8 in (18-20 cm) circumference. If your gauge is too loose, the gloves will slip down your hand and let in cold air; if it is too tight, the fabric will feel stiff and restrict your thumb movement.
Knit a 4×4 in (10×10 cm) swatch in stockinette stitch before starting the cuff. Measure your stitch count across the center 2 inches, multiply by two, and adjust your needle size up or down if your count does not match 20 stitches per 4 inches. Remember that cables naturally pull fabric inward, which gives the back of the hand a tailored, snug fit across the knuckles.
Stitch Abbreviations and Key Techniques
Familiarizing yourself with the specific stitch terminology used throughout the instructions ensures smooth progress through the cable rounds.
- k: Knit stitch.
- p: Purl stitch.
- C6F (Cable 6 Front): Slip next 3 stitches onto a cable needle and hold at the front of your work; knit the next 3 stitches from the left needle, then knit the 3 stitches from the cable needle.
- pm / sm: Place marker / slip marker.
- CO: Cast on.
- DPNs: Double-pointed needles.
- Backward Loop CO: Form a loop with the working yarn around your thumb and transfer it to the right needle to create an open thumb bridge.
Step-by-Step Knitted Fingerless Gloves Pattern Instructions
Follow the precise written instructions below to work both the right and left gloves seamlessly in the round from the cuff upward to the fingers.
Finished size: 7.2 in (18.3 cm) hand circumference, 7 in (18 cm) total length; fits adult hand 7-8 in (18-20 cm) circumference
Gauge: 20 sts x 28 rnds = 4 x 4 in (10 x 10 cm) in stockinette stitch worked in the round on US 7 (4.5 mm) needles
Abbreviations (US terms)
| Abbreviation | Meaning |
|---|---|
| C6F | Cable 6 Front: slip next 3 sts to cable needle and hold to front of work, k3, then k3 from cable needle |
| CO | cast on |
| DPNs | double-pointed needles |
| k | knit |
| k2tog | knit 2 stitches together (single right-leaning decrease) |
| p | purl |
| pm | place marker |
| rep | repeat |
| sm | slip marker |
| sts | stitches |
| rnd | round |
| rnds | rounds |
| tog | together |
Sizing
| Size | Hand Circumference | Glove Circumference | Total Length |
|---|---|---|---|
| Adult Medium | 7-8 in (18-20 cm) | 7.2 in (18.3 cm) | 7 in (18 cm) |
Pattern Notes
- Both gloves are worked seamlessly in the round from the cuff up to the fingers using double-pointed needles or the magic loop method.
- Pattern stitch count is 36 sts throughout the body of the glove.
- The back-of-hand panel (18 sts) features a central 6-stitch rope cable framed by 2 purl stitches on each side and 4-stitch seed stitch borders.
- The palm panel (18 sts) is worked in stockinette stitch (knit every round).
- Seed Stitch (over 4 sts): Rnd 1: *k1, p1; rep from *. Rnd 2: *p1, k1; rep from *. Alternate Rnds 1 and 2.
- Thumb openings are created by placing 6 thumb stitches onto waste yarn and casting on 6 replacement stitches using the backward loop method.
- Cables cross every 6 rounds on Rnds 3, 9, 15, 21, and 27 of the hand section.
Right Glove (Dusty Pink)
- Cast on 36 sts using the long-tail cast on method. Distribute evenly over DPNs (12-12-12 sts) or circular needle. Place marker for beginning of round and join in the round, being careful not to twist (36 sts).
- Rnds 1-14: *k2, p2; rep from * to end of rnd (36 sts).
- Rnd 15: (Hand Setup Rnd): [k1, p1] twice, p2, k6, p2, [p1, k1] twice, pm for side, k18 to end of rnd (36 sts).
- Rnd 16: [p1, k1] twice, p2, k6, p2, [k1, p1] twice, sm, k18 to end (36 sts).
- Rnd 17: (Cable Rnd): [k1, p1] twice, p2, C6F, p2, [p1, k1] twice, sm, k18 to end (36 sts).
- Rnd 18: [p1, k1] twice, p2, k6, p2, [k1, p1] twice, sm, k18 to end (36 sts).
- Rnd 19: [k1, p1] twice, p2, k6, p2, [p1, k1] twice, sm, k18 to end (36 sts).
- Rnd 20: [p1, k1] twice, p2, k6, p2, [k1, p1] twice, sm, k18 to end (36 sts).
- Rnd 21: [k1, p1] twice, p2, k6, p2, [p1, k1] twice, sm, k18 to end (36 sts).
- Rnd 22: [p1, k1] twice, p2, k6, p2, [k1, p1] twice, sm, k18 to end (36 sts).
- Rnd 23: (Cable Rnd): [k1, p1] twice, p2, C6F, p2, [p1, k1] twice, sm, k18 to end (36 sts).
- Rnd 24: [p1, k1] twice, p2, k6, p2, [k1, p1] twice, sm, k18 to end (36 sts).
- Rnd 25: [k1, p1] twice, p2, k6, p2, [p1, k1] twice, sm, k18 to end (36 sts).
- Rnd 26: [p1, k1] twice, p2, k6, p2, [k1, p1] twice, sm, k18 to end (36 sts).
- Rnd 27: [k1, p1] twice, p2, k6, p2, [p1, k1] twice, sm, k18 to end (36 sts).
- Rnd 28: (Right Thumb Opening Rnd): [p1, k1] twice, p2, k6, p2, [k1, p1] twice, sm, slip next 6 sts onto waste yarn for thumb, backward loop CO 6 sts onto right needle, k12 to end (36 sts).
- Rnd 29: (Cable Rnd): [k1, p1] twice, p2, C6F, p2, [p1, k1] twice, sm, k18 to end (36 sts).
- Rnd 30: [p1, k1] twice, p2, k6, p2, [k1, p1] twice, sm, k18 to end (36 sts).
- Rnd 31: [k1, p1] twice, p2, k6, p2, [p1, k1] twice, sm, k18 to end (36 sts).
- Rnd 32: [p1, k1] twice, p2, k6, p2, [k1, p1] twice, sm, k18 to end (36 sts).
- Rnd 33: [k1, p1] twice, p2, k6, p2, [p1, k1] twice, sm, k18 to end (36 sts).
- Rnd 34: [p1, k1] twice, p2, k6, p2, [k1, p1] twice, sm, k18 to end (36 sts).
- Rnd 35: (Cable Rnd): [k1, p1] twice, p2, C6F, p2, [p1, k1] twice, sm, k18 to end (36 sts).
- Rnd 36: [p1, k1] twice, p2, k6, p2, [k1, p1] twice, sm, k18 to end (36 sts).
- Rnds 37-42: *k2, p2; rep from * to end of rnd, removing side marker on first rnd (36 sts).
- Rnd 43: (Bind Off): Bind off all 36 sts loosely in 2×2 ribbing pattern (k the knits, p the purls). Cut yarn leaving an 8 in (20 cm) tail and pull through final loop (0 sts).
Left Glove (Dusty Pink)
- Cast on 36 sts using the long-tail cast on method. Distribute evenly over DPNs (12-12-12 sts) or circular needle. Place marker for beginning of round and join in the round, being careful not to twist (36 sts).
- Rnds 1-14: *k2, p2; rep from * to end of rnd (36 sts).
- Rnd 15: (Hand Setup Rnd): [k1, p1] twice, p2, k6, p2, [p1, k1] twice, pm for side, k18 to end of rnd (36 sts).
- Rnd 16: [p1, k1] twice, p2, k6, p2, [k1, p1] twice, sm, k18 to end (36 sts).
- Rnd 17: (Cable Rnd): [k1, p1] twice, p2, C6F, p2, [p1, k1] twice, sm, k18 to end (36 sts).
- Rnd 18: [p1, k1] twice, p2, k6, p2, [k1, p1] twice, sm, k18 to end (36 sts).
- Rnd 19: [k1, p1] twice, p2, k6, p2, [p1, k1] twice, sm, k18 to end (36 sts).
- Rnd 20: [p1, k1] twice, p2, k6, p2, [k1, p1] twice, sm, k18 to end (36 sts).
- Rnd 21: [k1, p1] twice, p2, k6, p2, [p1, k1] twice, sm, k18 to end (36 sts).
- Rnd 22: [p1, k1] twice, p2, k6, p2, [k1, p1] twice, sm, k18 to end (36 sts).
- Rnd 23: (Cable Rnd): [k1, p1] twice, p2, C6F, p2, [p1, k1] twice, sm, k18 to end (36 sts).
- Rnd 24: [p1, k1] twice, p2, k6, p2, [k1, p1] twice, sm, k18 to end (36 sts).
- Rnd 25: [k1, p1] twice, p2, k6, p2, [p1, k1] twice, sm, k18 to end (36 sts).
- Rnd 26: [p1, k1] twice, p2, k6, p2, [k1, p1] twice, sm, k18 to end (36 sts).
- Rnd 27: [k1, p1] twice, p2, k6, p2, [p1, k1] twice, sm, k18 to end (36 sts).
- Rnd 28: (Left Thumb Opening Rnd): [p1, k1] twice, p2, k6, p2, [k1, p1] twice, sm, k12, slip next 6 sts onto waste yarn for thumb, backward loop CO 6 sts onto right needle to end (36 sts).
- Rnd 29: (Cable Rnd): [k1, p1] twice, p2, C6F, p2, [p1, k1] twice, sm, k18 to end (36 sts).
- Rnd 30: [p1, k1] twice, p2, k6, p2, [k1, p1] twice, sm, k18 to end (36 sts).
- Rnd 31: [k1, p1] twice, p2, k6, p2, [p1, k1] twice, sm, k18 to end (36 sts).
- Rnd 32: [p1, k1] twice, p2, k6, p2, [k1, p1] twice, sm, k18 to end (36 sts).
- Rnd 33: [k1, p1] twice, p2, k6, p2, [p1, k1] twice, sm, k18 to end (36 sts).
- Rnd 34: [p1, k1] twice, p2, k6, p2, [k1, p1] twice, sm, k18 to end (36 sts).
- Rnd 35: (Cable Rnd): [k1, p1] twice, p2, C6F, p2, [p1, k1] twice, sm, k18 to end (36 sts).
- Rnd 36: [p1, k1] twice, p2, k6, p2, [k1, p1] twice, sm, k18 to end (36 sts).
- Rnds 37-42: *k2, p2; rep from * to end of rnd, removing side marker on first rnd (36 sts).
- Rnd 43: (Bind Off): Bind off all 36 sts loosely in 2×2 ribbing pattern (k the knits, p the purls). Cut yarn leaving an 8 in (20 cm) tail and pull through final loop (0 sts).
Right Thumb Ribbing (Dusty Pink)
- Transfer the 6 held sts from waste yarn onto DPNs. Join dusty pink yarn and knit across these 6 sts, pick up and knit 2 sts along the side gap, pick up and knit 6 sts from the cast-on edge, and pick up and knit 2 sts along the opposite side gap. Distribute the 16 sts evenly across needles and place marker for beginning of round (16 sts).
- Rnd 1: (Decrease Rnd): *k2, p2; rep from * to last 4 sts, k2tog, p2tog (14 sts).
- Rnds 2-4: *k1, p1; rep from * to end of rnd (14 sts).
- Rnd 5: (Bind Off): Bind off all 14 sts loosely in 1×1 ribbing pattern (k the knits, p the purls). Cut yarn leaving an 8 in (20 cm) tail and pull through final loop (0 sts).
Left Thumb Ribbing (Dusty Pink)
- Transfer the 6 held sts from waste yarn onto DPNs. Join dusty pink yarn and knit across these 6 sts, pick up and knit 2 sts along the side gap, pick up and knit 6 sts from the cast-on edge, and pick up and knit 2 sts along the opposite side gap. Distribute the 16 sts evenly across needles and place marker for beginning of round (16 sts).
- Rnd 1: (Decrease Rnd): *k2, p2; rep from * to last 4 sts, k2tog, p2tog (14 sts).
- Rnds 2-4: *k1, p1; rep from * to end of rnd (14 sts).
- Rnd 5: (Bind Off): Bind off all 14 sts loosely in 1×1 ribbing pattern (k the knits, p the purls). Cut yarn leaving an 8 in (20 cm) tail and pull through final loop (0 sts).
Finishing
- Thread the yarn tails at the thumb openings onto a tapestry needle and close any small gaps at the corners of the thumb gussets on the wrong side.
- Weave in all remaining yarn tails securely on the wrong side of both gloves.
- Wet block gloves: soak in lukewarm water with mild wool wash for 15 minutes, gently squeeze out excess water in a towel without wringing, and lay flat to dry to finished measurements (7 in / 18 cm long by 3.5 in / 9 cm wide flat).
Pro tip: When working round 28 to create the thumb opening, cast on the 6 backward loop stitches firmly to keep the base of the thumb neat and prevent loose gaps along the palm edge.
Troubleshooting Common Cable and Sizing Issues
Working cables in the round can occasionally present tension unevenness or alignment errors that are easy to correct once identified.
| Issue | Cause | Solution |
|---|---|---|
| Cable crosses look excessively tight or distorted | Yarn held too tightly while knitting stitches off the cable needle | Keep stitches close to the tips of your needles when working C6F crosses so the traveling strands have sufficient slack. |
| Glove width exceeds 3.5 in (9 cm) flat | Gauge is looser than 20 sts per 4 in (10 cm) | Switch to a smaller needle size, such as US 6 (4.0 mm), to achieve the required 20-stitch gauge. |
| Top edge flares out or feels tight around knuckles | Bind-off tension does not match the ribbing elasticity | Work the bind off strictly in 2×2 ribbing pattern (knitting knits, purling purls) while keeping each pass-over loop relaxed. |
| Gaps appear at thumb opening corners | Loose tension when joining the backward loop cast-on stitches | Use the yarn tails to snug up the corners when weaving in ends on the inside of the glove. |
Frequently Asked Questions
Can I use cotton yarn instead of wool for these fingerless gloves?
Cotton yarn lacks the natural elasticity and memory of wool, which means your ribbed cuffs and top edges may stretch out and loosen over time. If you prefer a plant-based fiber, choose a cotton-acrylic blend that provides structural bounce to hold the 36-stitch circumference snugly against your wrist.
How do I adjust the pattern for a larger or smaller hand size?
This specific pattern is written for one standard adult medium size (7-8 in / 18-20 cm circumference), and modifying stitch numbers will disrupt the cable panels and 2×2 ribbing alignment. To achieve a slightly smaller or larger fit without changing the pattern counts, adjust your needle size up or down by one US size to alter your gauge.
What is the easiest way to hold stitches for the thumb opening?
Threading a 12 in (30 cm) piece of smooth waste yarn on a tapestry needle and slipping the 6 thumb stitches onto it keeps them flexible and flat while you knit the upper hand. Avoid using rigid metal stitch holders, as they can pull and distort the neighboring stitches while working in the round.
Should I block my knitted fingerless gloves before wearing them?
Gently wet blocking your finished gloves evens out the background texture and opens up the C6F cable twists for clean stitch definition. Soak the mitts in lukewarm water with wool wash, squeeze out the moisture in a clean towel, and lay them flat to dry according to the 7 in (18 cm) length and 3.5 in (9 cm) width dimensions.
Wrap Up Your Handmade Glove Project
Completing your own pair of wool mitts provides a practical, stylish accessory that keeps your hands warm while keeping your fingers free for daily activities. By taking the time to work your cable crosses evenly and maintaining consistent tension across the 2×2 ribbing, you create a tailored accessory. Use this versatile Knitted Fingerless Gloves Pattern to master intermediate round knitting techniques and enjoy cozy comfort all season long.

