In this post
- At a Glance
- Why This Patchwork Tote Bag Works and What You Will Learn
- Materials and Tools Needed
- Choosing the Right Fabric for Structure
- Cutting Chart and Preparation
- Step-by-Step Construction Guide
- Finishing and Pressing for a Professional Look
- Variations and Customizing Your Tote
- Troubleshooting Common Tote Bag Issues
- Care and Washing Instructions
- Frequently Asked Questions
- Completing Your Handmade Patchwork Tote
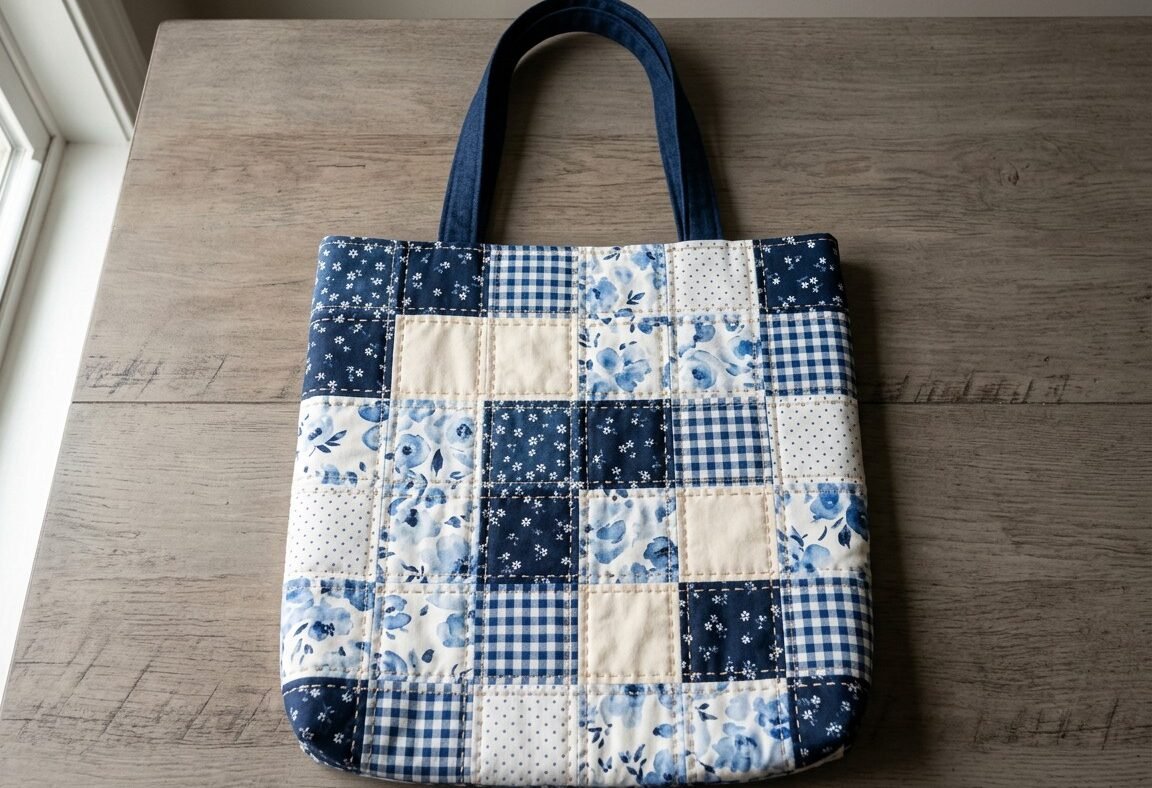
Sewing your own everyday accessories allows you to create items that are both hard-wearing and tailored to your personal aesthetic. Making a structured Patchwork Tote Bag is an approachable project designed for a confident beginner who wants to practice piecing crisp geometric blocks, handling stabilizing layers, and sewing boxed corners. Featuring a timeless palette of blue-and-white gingham, florals, and solid cream cotton, this project transforms simple fabric squares into an everyday carryall. By layering your pieced panels with quilt batting and adding simple straight-line quilting, you give the bag enough body to stand upright without slouching. In about 3 to 4 hours, you will sew a finished tote measuring approximately 14 in x 14 in x 4 in (35 cm x 35 cm x 10 cm), complete with matching fabric shoulder straps and a fully lined interior.
At a Glance
Before preparing your work area, check the key specifications of this project to ensure you have the proper time and supplies arranged.
| Skill Level | Time to Complete | Finished Dimensions | Primary Fabric | Key Techniques |
|---|---|---|---|---|
| Confident beginner | 3-4 hours | approx. 14 in x 14 in x 4 in (35 cm x 35 cm x 10 cm) | Medium weight quilting cotton | Patchwork piecing, straight-line quilting, boxing corners |
Why This Patchwork Tote Bag Works and What You Will Learn
Everyday totes often collapse under the weight of books or groceries if made from a single layer of cotton. This project solves that problem by integrating medium-weight quilt batting directly beneath the pieced exterior. The straight-line quilting secures the fabric to the batting, distributing mechanical strain across the entire panel rather than concentrating it at the base seams.
As you sew this bag, you will develop several foundational skills. You will practice maintaining a consistent 1/4 inch (6 mm) seam allowance when joining squares, which ensures your corners meet at sharp intersections. You will also learn how to calculate and cut square cutouts to box the bottom corners, creating a flat 4-inch (10 cm) depth. Finally, you will learn the standard method for dropping an exterior bag into an enclosed lining, securing the handles in the seam, and turning everything through a discrete opening for a clean finish.
Materials and Tools Needed
Gathering the correct notions and fabrics ensures your bag retains crisp lines and holds up to regular use.
- Assorted prints: 1/4 yard (0.25 m) total of medium-weight blue and white cotton print fat quarters (florals, gingham checks, and solid cream).
- Lining fabric: 1/2 yard (0.5 m) medium-weight cotton (contrasting small-scale floral print).
- Batting: 1/2 yard (0.5 m) low-loft cotton quilt batting or fusible fleece.
- Thread: Matching all-purpose polyester sewing thread in a neutral off-white or light blue.
- Sewing machine: Standard domestic machine fitted with a universal sewing needle size 80/12.
- Cutting tools: Rotary cutter, 45 mm blade, self-healing cutting mat, acrylic quilting ruler, and sharp fabric shears.
- Pressing tools: Steam iron and a flat ironing board.
- Notions: Sewing pins or quilting clips, fabric marking chalk, and a seam ripper.
Choosing the Right Fabric for Structure
Quilting cotton works well for this bag because it is stable, easy to press flat, and resists stretching along the grain. Using medium-weight cottons (around 4.0 to 4.5 oz per square yard) ensures that the multiple seam intersections in the patchwork remain flat rather than bulky. Avoid using stretchy knits, lightweight voiles, or heavy upholstery fabrics for the pieced exterior, as mixing fabrics of different weights can cause the seams to ripple during quilting.
The interior structure relies heavily on your choice between cotton batting and fusible fleece. Low-loft cotton batting yields a soft, traditional quilted texture with classic drape, while fusible fleece produces a stiffer, more self-supporting wall. Whichever you select, pre-wash your cotton fabrics before cutting to prevent uneven shrinkage later, but do not wash your batting or fusible fleece.
Cutting Chart and Preparation
Press all pre-washed fabrics with a hot steam iron to remove wrinkles before measuring. Accurate rotary cutting is essential for matching the patchwork grid during assembly.
| Piece Description | Material | Quantity | Cut Dimensions |
|---|---|---|---|
| Patchwork Squares | Blue & white cotton prints / solids | 32 pieces | 4.25 in x 4.25 in (10.8 cm x 10.8 cm) |
| Exterior Batting Panels | Cotton batting or fusible fleece | 2 pieces | 15.5 in x 15.5 in (39.5 cm x 39.5 cm) |
| Lining Panels | Contrasting floral cotton | 2 pieces | 15.5 in x 15.5 in (39.5 cm x 39.5 cm) |
| Shoulder Straps | Blue cotton print | 2 pieces | 4 in x 26 in (10 cm x 66 cm) |
Pro tip: When using a rotary cutter, align the ruler marks directly along the grainline of the fabric, keep your fingers clear of the acrylic edge, and apply firm, downward pressure to prevent the ruler from slipping.
Step-by-Step Construction Guide
With all pieces pressed and cut, work through the assembly systematically, starting with the exterior patchwork panels before moving to the quilting, structural seams, and lining.
Piecing the Patchwork Exterior
- Arrange your squares into a 4×4 grid for each exterior panel (16 squares per panel). Distribute the gingham, florals, and cream solids evenly to balance the colors.
- Sew the squares into horizontal rows using a strict 1/4 inch (6 mm) seam allowance and a regular stitch length of 2.5 mm. Place adjacent squares right sides together, pin at the edge, and stitch. You will have four rows of four squares for each panel.
- Press the seam allowances of row 1 and row 3 to the right, and rows 2 and 4 to the left. Alternating seam directions ensures that the seam junctions nest together neatly when you join the rows.
- Join the horizontal rows together to form the complete 4×4 panel. Pin at every seam intersection, ensuring the folded seams lock tightly against one another. Sew across with a 1/4 inch (6 mm) seam allowance and press these long seams open. Repeat for the second exterior panel.
Quilting and Assembling the Exterior Bag
- Layer the exterior panels with batting by laying the batting flat on your table and centering the pieced exterior right side up on top. Smooth out any wrinkles with your hands and secure the layers together using sewing pins spaced every 3 inches (7.6 cm).
- Quilt straight lines across the patchwork by stitching 1/4 inch (6 mm) away from each seam line across the entire panel. Increase your machine stitch length to 3.0 mm for a clean, visible topstitch that does not bunch the batting.
- Trim the quilted panels evenly so they measure exactly 15.5 in x 15.5 in (39.5 cm x 39.5 cm).
- Cut corner notches for boxing on both quilted exterior panels. Using an acrylic ruler and fabric pen, mark a 2 in x 2 in (5 cm x 5 cm) square out of both bottom corners, measuring from the raw cut edge. Cut along these lines with scissors.
- Sew the exterior sides and bottom by placing the two quilted panels right sides together. Pin the side edges and the bottom edge, leaving the top opening and the corner cutouts open. Sew these three seams using a 1/2 inch (5.1 cm) seam allowance, backstitching securely at the beginning and end. Press the seams open.
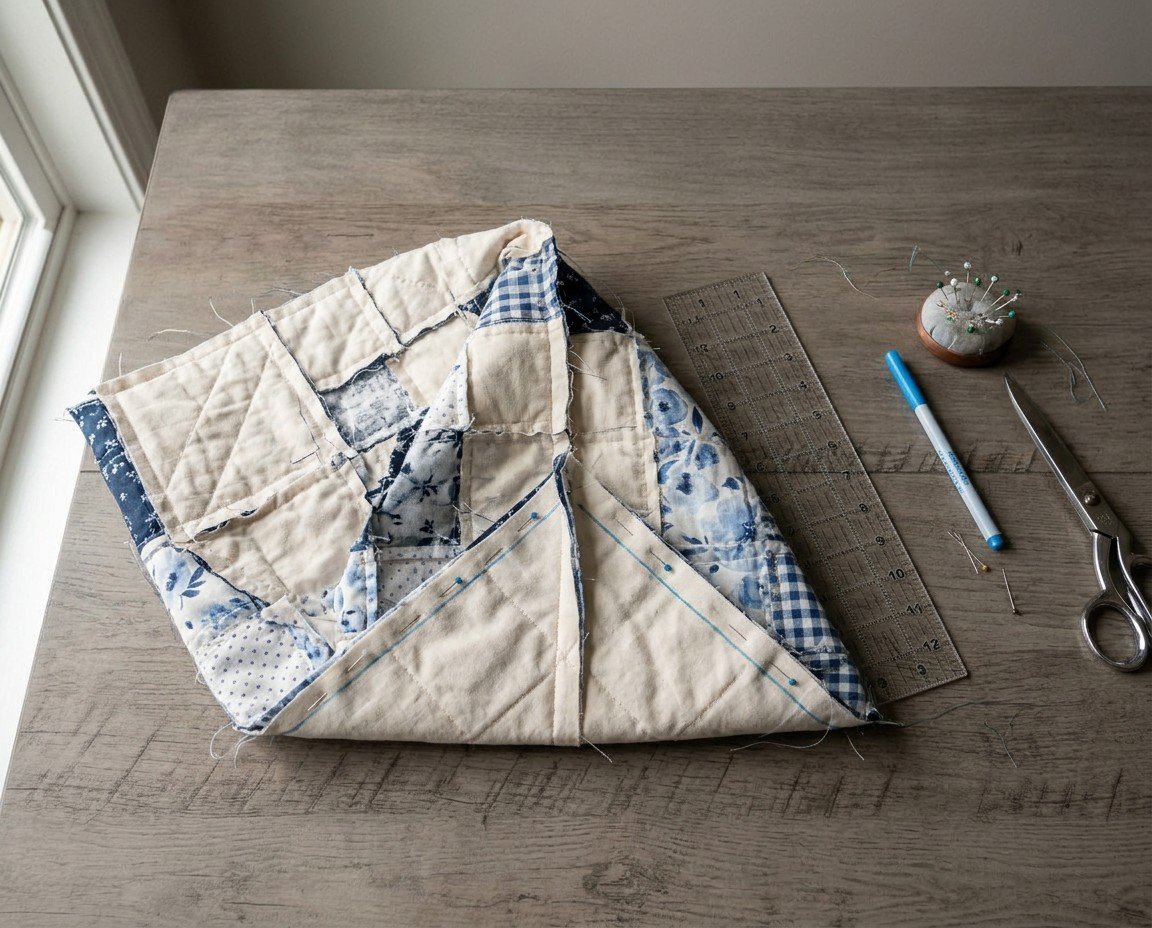
- Box the bottom corners by pinching the bottom seam and side seam together at one cutout corner, aligning the seam lines exactly in the center. Flatten the resulting straight edge, pin firmly, and stitch across with a 1/2 inch (5.1 cm) seam allowance. Repeat for the opposite corner to form the 4-inch base.
Pro tip: When boxing corners, nest the seam allowances by pushing the bottom seam allowance to the left and the side seam allowance to the right. This prevents needle deflection and keeps your corner seam smooth.
Constructing Straps and Lining
- Fold and press the strap strips lengthwise with wrong sides together to create a center crease. Open the strip, fold each long raw edge inward to align with the center crease, and press. Fold the strip in half along the original crease so the raw edges are fully enclosed inside a 1-inch (2.5 cm) wide band.
- Topstitch the straps along both long edges, 1/8 inch (3 mm) from the edge, using a stitch length of 3.0 mm. Repeat for the second strap.
- Cut corner notches in the lining panels identical to the exterior panels: 2 in x 2 in (5 cm x 5 cm) out of the two bottom corners of each 15.5 in x 15.5 in (39.5 cm x 39.5 cm) lining piece.
- Assemble the lining bag by placing the two pieces right sides together. Sew the sides using a 1/2 inch (5.1 cm) seam allowance. Sew the bottom seam using the same allowance, but leave a 4-inch (10 cm) gap in the center for turning the tote right side out later. Box the bottom corners in the same manner as the exterior bag.
Final Assembly and Topstitching
- Position and baste the straps to the right side of the exterior bag’s top edge. Place each strap end 3.5 inches (9 cm) in from the side seams. Ensure the strap is not twisted. Pin the raw ends of the strap flush with the top raw edge of the bag, and baste in place 1/4 inch (6 mm) from the edge.
- Join the exterior bag and lining with right sides together. Keep the exterior bag turned right side out and the lining turned wrong side out. Insert the exterior bag inside the lining so the right sides touch, aligning the top raw edges and matching the side seams. Pin generously around the entire top circumference.
- Stitch the top edge completely around the opening using a 1/2 inch (5.1 cm) seam allowance. Sew steadily over the strap attachments to keep layers flat.
- Turn the bag right side out by gently pulling the exterior bag and straps through the 4-inch gap left in the bottom of the lining.
- Close the lining gap by pressing the raw edges of the opening 1/2 inch (5.1 cm) inside. Topstitch the opening closed 1/16 inch (1.5 mm) from the edge with your sewing machine.
- Topstitch the top perimeter after pushing the lining down inside the exterior bag. Roll the top seam between your fingers so the lining rolls slightly toward the inside, then press the top edge with a steam iron. Sew a final line of topstitching around the entire opening 1/8 inch (3 mm) from the top edge.
Pro tip: Increase your stitch length to 3.5 mm for the final topstitching around the upper rim. A longer stitch travels smoothly over the bulky strap junctions without creating tension knots.
Finishing and Pressing for a Professional Look
Proper pressing provides the structural crispness that separates handmade items from poorly constructed ones. After completing the final topstitching around the rim, direct your steam iron into the interior base of the bag. Press the boxed corner triangles flat against the bottom panel so the tote holds its 4-inch (10 cm) depth naturally when placed on a table.
Work around the outer side seams with the tip of the iron, setting the seam lines flat. If your batting compressed slightly during topstitching, a burst of steam held 1 inch (2.5 cm) away from the quilted patchwork will restore its loft without crushing the cotton fibers.
Variations and Customizing Your Tote
Once you are comfortable with this basic construction method, you can adapt the template to create different looks using scraps from other projects.
- Alternate grid layouts: Replace the 4×4 grid of 4.25-inch squares with an 8×8 grid of 2.375-inch (6 cm) squares for a finer mosaic design.
- Contrasting strap accents: Use two different fabric prints for the straps—one for the outer facing and another for the underside—for a subtle peek-a-boo design.
- Cross-hatch quilting: Instead of vertical and horizontal lines, mark 45-degree diagonal lines across the panel to create a diamond quilting motif across your patchwork.
- Monochrome color schemes: Swap the blue and white palette for varying shades of charcoal, dove gray, and linen for a neutral, minimalist finish.
Troubleshooting Common Tote Bag Issues
Piecing multiple seams and handling bulky layers can occasionally cause alignment or feeding issues. Use this reference to correct common sewing snags.
| Problem | Likely Cause | Solution |
|---|---|---|
| Patchwork corners do not align | Inconsistent seam allowance or seams shifted during feeding | Pin directly through the seam intersections and nest the folded allowances before stitching. |
| Puckering along quilting lines | Layers shifted because they were not pinned sufficiently | Use a walking foot (even feed foot) and increase stitch length to 3.0 mm. Pin every 3 inches (7.6 cm). |
| Lining bunches inside finished bag | Lining was cut larger than the quilted exterior panel | Trim the lining panels to match the trimmed exterior quilted pieces exactly before assembling. |
| Needle thread breaks at strap junctions | Too much bulk for a standard fine needle | Switch to a fresh universal size 80/12 needle or a denim 90/14 needle when topstitching over strap layers. |
Care and Washing Instructions
Cotton tote bags are easy to maintain, but gentle handling will preserve the structure and prevent color fading. Machine wash the bag on a gentle cycle using cold water and a mild liquid detergent. Avoid bleach or heavy chemical detergents, which can weaken the cotton fibers over time.
Reshape the bag with your hands while it is damp and lay it flat to air dry. Do not tumble dry, as the heat can shrink the cotton batting unevenly and cause the corners to distort. Once dry, press the bag with medium heat and steam to restore its structured rectangular shape.
Frequently Asked Questions
What is the best batting to use for a structured patchwork tote bag?
Low-loft cotton batting or low-loft fusible fleece works well for this project. Cotton batting gives a soft, traditional quilted texture, while fusible fleece adheres directly to the back of the cotton panels to provide a stiffer, self-supporting structure.
Can I use standard fabric scraps instead of fat quarters for the patchwork exterior?
Yes, standard fabric scraps are suitable as long as they are medium-weight quilting cottons of similar thickness. Simply cut your scraps into 4.25 in x 4.25 in (10.8 cm x 10.8 cm) squares, ensuring the grainline runs parallel to one of the straight edges.
How do I ensure my patchwork grid aligns neatly when joining rows?
Press the seam allowances of alternating rows in opposite directions so the seam junctions nest tightly against each other when right sides are placed together. Pin directly through these nested intersections before sewing with an exact 1/4 inch (6 mm) seam allowance.
What is the easiest way to box the bottom corners of the bag accurately?
The most precise method is cutting out a 2 in x 2 in (5 cm x 5 cm) square notch from each bottom corner before sewing the side and bottom seams. After joining the sides and bottom, pull the corner open, match the side seam directly to the bottom seam, and stitch straight across the opening.
Completing Your Handmade Patchwork Tote
By taking time to accurately cut your squares, nest your seam allowances, and reinforce your shoulder straps, you have built a durable, functional Patchwork Tote Bag designed for daily use. The combination of batting, straight-line quilting, and fully enclosed lining seams ensures the bag holds its shape through regular errands. For your next build, consider experimenting with contrasting thread colors along the quilting lines to make your pieced pattern stand out even more.