In this post
- At a Glance: Quilted Leaf Mug Rug Sewing Project
- Why This Quilted Leaf Mug Rug Sewing Project Works
- Materials and Tools Needed
- Choosing the Right Fabric for Your Leaf Mug Rug
- Cutting Chart and Preparation
- Layering and Stitching the Leaf Base
- Adding Decorative Veins with Hand Quilting
- Finishing and Pressing
- Variations and Customizing
- Troubleshooting Common Issues
- Care and Washing Instructions
- Frequently Asked Questions
- Enjoy Your Finished Quilted Leaf Mug Rug
If your tabletop needs protection from warm drinks, making this Quilted Leaf Mug Rug Sewing Project is an enjoyable way to practice practical stitching skills. This beginner-level project takes 45 to 60 minutes to complete and results in an organic, nature-inspired accent for your home decor. Measuring approximately 6 x 8 in (15 x 20 cm), the finished coaster comfortably holds your favorite morning mug alongside a small treat.
You will work with medium-weight woven linen and cotton batting, using a turned-edge method. Along the way, you will practice sewing smooth curves on your machine and stitching prominent decorative leaf veins by hand using standard embroidery floss.
At a Glance: Quilted Leaf Mug Rug Sewing Project
Here is a quick overview of the key specifications, timeline, and core techniques required for this project.
| Skill Level | Beginner |
|---|---|
| Time to Complete | 45–60 minutes |
| Finished Size | approx. 6 x 8 in (15 x 20 cm) |
| Main Fabric | Medium weight linen or linen-blend |
| Key Techniques | Sewing curved edges, turned edges, hand quilting running stitches |
Why This Quilted Leaf Mug Rug Sewing Project Works
Small quilting projects provide fast results without demanding yards of yardage or hours of continuous assembly. Because this design relies on a turned-edge construction, it allows you to finish the edges cleanly. It gives you the freedom to focus entirely on machine needle control along curved lines.
The addition of hand-stitched running stitches across the surface serves two purposes: it anchors the batting securely to prevent shifting in the wash, and it creates the distinct, organic texture of leaf veins. Working these stitches by hand offers a relaxed, tactile sewing experience where minor variations in stitch length actually enhance the natural look of the leaf.
Materials and Tools Needed
Before cutting into your fabric, collect the following supplies and equipment at your sewing station.
- Fabric: 1/4 yard (0.25 m) medium weight linen or linen-blend fabric
- Batting: 10 x 10 in (25 x 25 cm) piece of low-loft cotton batting or fleece
- Thread: All-purpose polyester or cotton sewing thread for machine construction
- Floss: Matching or tonal embroidery floss (or perle cotton/quilting thread) for leaf veins
- Sewing Machine: Fitted with a standard presser foot
- Machine Needle: Universal sewing needle size 80/12
- Hand Needle: Hand sewing embroidery or chenille needle (size 22 or 24) with an eye large enough for floss
- Cutting Tools: Sharp fabric scissors and paper scissors
- Marking & Pressing: Water-soluble or heat-erasing fabric pen, steam iron, and pressing mat
- Template: Heavy scrap paper or cardstock
Choosing the Right Fabric for Your Leaf Mug Rug
Linen and cotton-linen blends are well suited for this project because their woven texture complements the leaf shape. Woven fabrics hold a crisp crease when pressed, which makes turning sharp points and smooth outer curves far simpler for beginner sewists. Natural neutral tones like oatmeal beige, sage, and dark olive green highlight the contrast of the stitched veins.
Avoid using stretchy knit fabrics like jersey or interlock, as the edges will stretch out of shape as you guide the curves under the presser foot. Similarly, very thick canvas or heavy denim will create excessive bulk at the leaf tip and stem when turned right-side out. A pre-washed, medium-weight woven textile provides the right balance of structure, heat resistance, and flexibility.
Pro tip: Always pre-wash and press your linen before cutting. Linen fibers shrink significantly during their first wash, and pre-shrinking ensures your finished mug rug will not warp later when laundered.
Cutting Chart and Preparation
To prepare your pieces, first draw a simple leaf shape on a piece of paper that fits within a 6 x 8 in (15 x 20 cm) bounding box, including an extended 1/2 in (5.1 cm) stem base. Cut out the paper shape to use as your template.
| Piece Description | Material | Quantity | Cut Dimensions |
|---|---|---|---|
| Leaf Front Panel | Medium weight linen | 1 | Cut using paper template (approx. 6 x 8 in / 15 x 20 cm) |
| Leaf Back Panel | Medium weight linen | 1 | Cut using paper template (approx. 6 x 8 in / 15 x 20 cm) |
| Inner Core | Cotton batting | 1 | Cut using paper template (approx. 6 x 8 in / 15 x 20 cm) |
Pin the paper template to your linen, trace around it with a fabric marker, and cut two matching fabric shapes with your fabric scissors. Cut a third matching shape from your cotton batting. Set the paper template aside to guide your vein placement later.
Layering and Stitching the Leaf Base
With the pieces cut, you can construct the padded leaf sandwich using a secure enclosed-seam method.
- Assemble the stack: Lay your cotton batting flat on your workspace. Place the leaf back panel face up on top of the batting. Place the leaf front panel face down on top of the back panel. The two linen pieces should sit right sides together, with the batting against the wrong side of the back panel. Pin all three layers together through the center and along the perimeter.
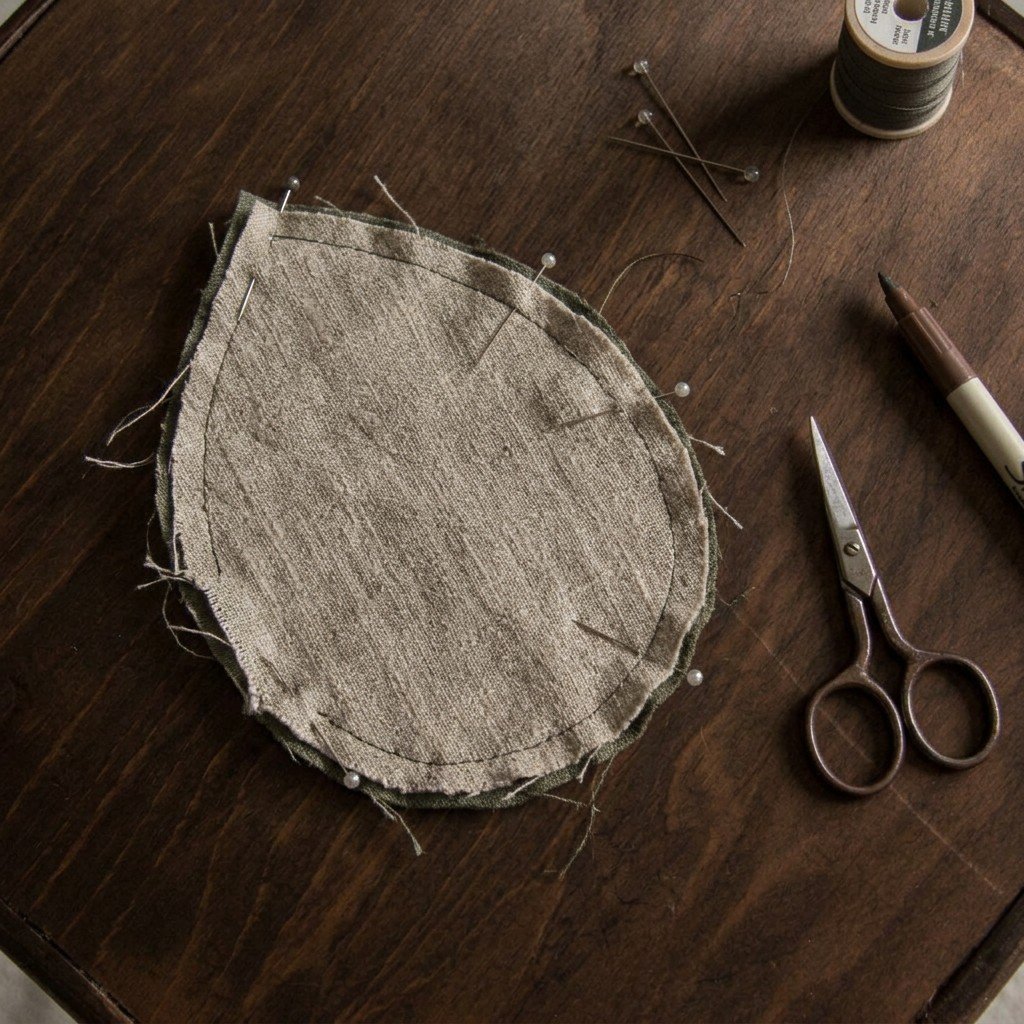
- Stitch the perimeter: Set your sewing machine to a standard stitch length of 2.5 mm and install a fresh universal 80/12 needle. Starting on one of the flatter side edges, sew around the leaf perimeter using a 1/4 in (6 mm) seam allowance. Backstitch at the start, follow the curves slowly, and leave a 2 in (5 cm) gap along one side for turning. Backstitch securely when stopping.
- Trim and notch: Clip small V-shaped notches along the outer convex curves, taking care not to snip into your stitch line. Trim the seam allowance at the leaf tip down to 1/8 in (3 mm) to eliminate bulk.
- Turn right-side out: Reach through the 2 in (5 cm) opening and gently pull the fabric right-side out. Use a blunt point turner or wooden chopstick to ease out the leaf tip and smooth the outer seam lines.
- Press flat: Tuck the raw edges of the opening inside by 1/4 in (6 mm) so they align smoothly with the stitched seam. Press the entire mug rug flat with a hot steam iron.
- Close the opening: Pin the opening shut. Topstitch around the entire leaf perimeter 1/8 in (3 mm) from the edge using a stitch length of 3.0 mm. This topstitching seals the turning gap and gives the leaf a defined edge.
Pro tip: When sewing tight curves on your machine, drop your sewing speed and pivot frequently. Keep the needle down in the fabric, raise the presser foot slightly, adjust the fabric angle by a millimeter or two, lower the foot, and continue stitching.
Adding Decorative Veins with Hand Quilting
Once the perimeter is cleanly topstitched and pressed, you can add the surface quilting that gives the piece its distinctive character.
- Mark the vein lines: Use your fabric marking pen and a ruler to lightly draw a central vein running from the base of the leaf to the tip. Sketch secondary veins angling outward from the center line toward the edges at roughly 45-degree angles, spacing them about 1 in (2.5 cm) apart.
- Thread your needle: Cut an 18 in (46 cm) length of embroidery floss. Separate three strands from the six-strand skein and thread them through your hand sewing needle. Tie a small knot at the long end.
- Bury the knot: Insert your needle between the fabric layers about 1/2 in (5.1 cm) away from where you want your first stitch to begin. Bring the point out directly on the marked center line. Tug gently so the knot pops through the top fabric layer and lodges invisibly inside the batting.
- Sew the running stitches: Work a simple running stitch along the marked vein lines. Push the needle straight down through all three layers and bring it back up, keeping each visible stitch about 1/8 in (3 mm) long with equal spaces between them. Keep your thread tension even so the fabric rests flat without puckering.
- Secure the thread ends: When you reach the end of a line, take a tiny backstitch on the underside, tie a small knot flat against the fabric, and insert the needle back into the center batting. Bring the needle out 1 in (2.5 cm) away, pull tight, and snip the floss flush with the linen surface so the tail disappears inside.
Finishing and Pressing
After completing all your hand-stitched vein lines, remove any remaining fabric marker traces according to the pen manufacturer’s directions (a light spritz of water or a quick pass with an iron). Lay your finished piece on a firm pressing surface with a clean pressing cloth over the top.
Press the leaf firmly with a hot steam iron for 5 to 8 seconds. Avoid sliding the iron back and forth, which can drag the hand stitches out of alignment. Pressing embeds the embroidery thread into the linen weave and flattens the cotton batting, giving your mug rug a neat, professional finish.
Variations and Customizing
This sewing technique easily adapts to different design preferences and home color schemes.
- Alternative Leaf Outlines: Adapt your original paper template into an oak leaf with rounded lobes or a pointed maple leaf silhouette using the same construction steps.
- High-Contrast Stitching: Use a bright white, cream, or mustard yellow embroidery floss against deep olive green or charcoal linen to make the vein pattern stand out.
- Machine Quilting Option: If you prefer a faster finish, replace the hand running stitch with a machine triple-stitch (stretch stitch) or a decorative serpentine stitch along the drawn vein lines.
- Seasonal Table Sets: Sew a set of four or six mug rugs using alternating autumn shades such as rust, mustard, terracotta, and olive linen.
Troubleshooting Common Issues
If you encounter difficulties during construction, use the following guide to identify the cause and apply the correct solution.
| Problem | Likely Cause | Fix |
|---|---|---|
| Lumpy, blunt leaf tip after turning | Excess batting and fabric bulk trapped in the corner point | Turn the project back wrong-side out and trim the seam allowance close to the point (approx. 1/8 in / 3 mm). Gently push the tip out with a point turner. |
| Puckering along hand-quilted vein lines | Embroidery floss tension pulled too tightly during the running stitch | Gently stretch the leaf diagonally to release tension. If puckers remain, clip the thread, pull it out, and re-stitch while keeping the thread relaxed against the surface. |
| Uneven, choppy curves from machine stitching | Stitching too fast without pivoting the fabric around curves | Shorten your machine stitch length to 2.0 mm on tight curves and pivot with the needle down every 2 to 3 stitches. |
| Exposed knots on the back panel | Knots tied on the exterior rather than buried inside the batting | Pop your starting knot into the batting layer through the front fabric, and sink your final knot tails between the layers before trimming. |
Care and Washing Instructions
To preserve the texture of the linen and keep the hand embroidery intact, hand wash your mug rug in cool water with a mild liquid detergent. Swish the piece gently without scrubbing or wringing the fabric. Rinse thoroughly in cold water to remove all soap residue.
Press the wet mug rug between two clean terry towels to absorb excess moisture, then lay it flat on a drying rack to air dry completely. Once dry, restore its crisp shape by pressing it with a hot iron using medium steam and a pressing cloth.
Frequently Asked Questions
Can I use cotton fabric instead of linen for this project?
Yes, standard 100% quilting cotton is an excellent substitute for medium-weight linen. It is easy to cut, press, and stitch, though it will have a smoother, less textured surface than linen. Ensure you pre-wash the cotton to prevent uneven shrinkage after the mug rug is assembled.
Do I need a special sewing machine foot for curved edges?
No, a standard universal presser foot is completely suitable for sewing the gentle curves of this leaf design. Sewing at a slow, controlled speed and setting your stitch length to 2.0–2.5 mm will give you total control around curved perimeters without needing a specialized foot.
How do I secure embroidery floss so it doesn’t unravel?
You can secure the floss by burying the starting knot between the fabric layers and anchoring the finish with two tiny backstitches hidden on the underside. Threading the tail end back through the inner batting before cutting ensures the knot cannot work loose with daily use.
Can I make these mug rugs without hand quilting?
Yes, you can quilt the vein lines using your sewing machine if you prefer not to stitch by hand. Select a straight stitch or a triple-stitch on your machine, lower your speed, and sew directly over the marked vein lines through all layers.
Enjoy Your Finished Quilted Leaf Mug Rug
You now have a completed, functional table accent made with simple construction techniques and textured hand stitching. This Quilted Leaf Mug Rug Sewing Project is a practical way to turn fabric remnants into pieces for your morning tea or coffee routine. For your next set, try experimenting with different linen weights and contrasting thread colors to create a coordinating collection for your home.