In this post
- How to Choose the Right Baby Memory Quilt Idea for Your Skill Level and Fabric
- Classic Patchwork and T-Shirt 12 Baby Memory Quilt Ideas to Turn Old Clothes into Keepsakes
- Unique Texture and Design Memory Quilt Concepts
- Special Keepsake and Display Quilt Styles
- Pro Tips for Sewing Your Baby Memory Quilt Faster
- Frequently Asked Questions
- Transform Outgrown Clothing into a Cherished Keepsake
Finding a meaningful way to preserve outgrown baby onesies, sleepers, and t-shirts can feel overwhelming when storage bins start overflowing. Exploring these 12 Baby Memory Quilt Ideas to Turn Old Clothes into Keepsakes gives you practical, creative methods to transform outgrown garments into a functional approx. 40 in x 50 in (102 cm x 127 cm) blanket. Designed for an intermediate skill level, these projects guide you through handling stretchy jersey knits, interlock cottons, and plush fleece using basic quilting techniques. In about 6-10 hours, you can stabilize irregular garments, slice them into uniform blocks, and piece together a soft keepsake that preserves early milestones. You will learn how to choose the right layout, prepare tricky knit fabrics with fusible interlining, and finish your quilt with a durable binding.
How to Choose the Right Baby Memory Quilt Idea for Your Skill Level and Fabric
Before cutting into outgrown garments, assess your collection of baby clothes to determine which project best suits your fabric selection. Most baby clothing collections consist of lightweight jersey knits, ribbed cottons, interlock fabrics, and polyester fleece. Because stretchy knits pull and warp under the sewing machine presser foot, working with mixed baby fabrics requires an intermediate quilting skill level and careful fabric stabilization.

A standard approx. 40 in x 50 in (102 cm x 127 cm) quilt top requires roughly 15 to 30 baby clothing items, depending on the block sizes you select. You will also need 1 yard (0.9 m) to 2 yards (1.8 m) of backing fabric, a 45 in x 60 in (114 cm x 152 cm) piece of batting, and 1/2 yard (0.5 m) of binding fabric. If your clothing pile contains mostly graphic onesies, a large-block format works best to showcase full illustrations without clipping important artwork. If your collection contains many small, solid-colored items, multi-piece patchwork or strip piecing allows you to use small scrap sections efficiently.
Stabilization is the foundation of sewing with baby knits. Fusing a lightweight, non-stretch interfacing to the reverse side of every knit piece turns unpredictable, stretchy clothing into stable fabric that behaves like standard woven quilting cotton. Always install a ballpoint or stretch needle in size 75/11 or 80/12 into your sewing machine to prevent skipped stitches or fabric snags when piecing knit blocks.
Pro tip: Always apply fusible interlining to the wrong side of garments before cutting your final block dimensions. Fusing before cutting prevents edges from curling and ensures your rotary cutter creates exact, square corners.
| Keepsake Style | Best Garment Types | Main Construction Technique | Time Required |
|---|---|---|---|
| Traditional Patchwork | Solid & small-print onesies | Square grid piecing with 1/4 inch seams | 6-8 hours |
| T-Shirt Style | Graphic onesies & baby tees | Fussy-cut stabilized motif blocks | 6-8 hours |
| I-Spy Style | Animal & object print sleepers | Uniform square grid assembly | 6-8 hours |
| Strip-Pieced Style | Baby blankets & footed sleepers | Long strip alignment and pressing | 7-9 hours |
| Memory with Pockets | Overalls, beanies & tiny socks | Appliqué and dimensional topstitching | 8-10 hours |
| Flannel Rag Quilt | Flannel sleepers & blankets | Exposed seam clipping with no binding | 6-8 hours |
| Sashiko / Mending | Woven rompers & knit bodysuits | Hand-stitched decorative reinforcement | 8-10 hours |
| Hexagon Paper Piecing | Small scraps from all garments | Hand-basted English paper piecing | 10+ hours |
| Embroidered Details | Smooth cotton & interlock knits | Center-block text stitching with border piecing | 7-9 hours |
| Miniature Wall Hanging | Select 5-10 favorite outfits | Scaled-down piecing with hanging sleeve | 6-7 hours |
| Double-Sided Receiving | Knit tops & woven swaddles | Reversible layered quilt sandwich | 7-9 hours |
| Shadow Box Display | Special milestone outfits | Partial block mounting for framing | 6-8 hours |
Classic Patchwork and T-Shirt 12 Baby Memory Quilt Ideas to Turn Old Clothes into Keepsakes
Matching your garments to structured piecing formats makes it simple to plan clean layouts and cut straight lines. These four traditional approaches feature square and rectangular blocks that highlight graphics while keeping fabric cutting straightforward.
-
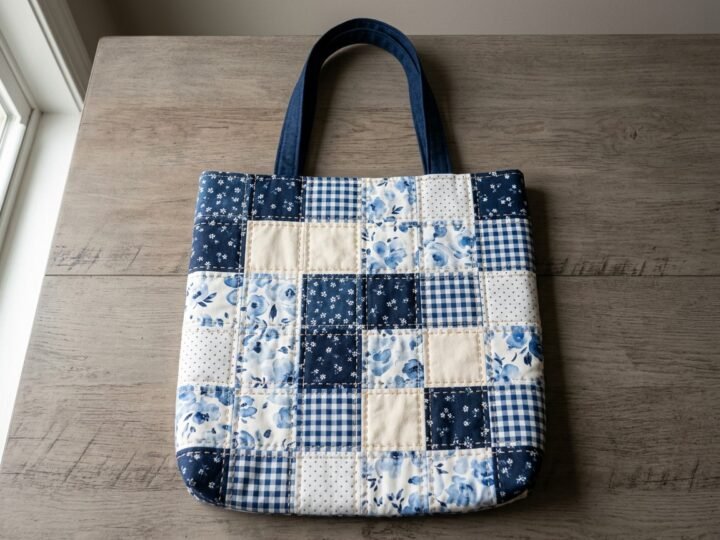
Traditional Patchwork Memory Quilt
This layout uses uniform squares, typically cut at 5 inches or 6 inches, arranged in an alternating grid across the approx. 40 in x 50 in (102 cm x 127 cm) surface. It works best with an intermediate skill level and requires 15 to 30 baby items containing diverse solid colors and micro-prints.
Requirements: Interfaced jersey knits, rotary cutter, cutting mat, quilting ruler, and 1/2 yard (0.5 m) binding fabric.
Expert Tip: Distribute dark, saturated colors evenly across your design floor before sewing rows together to prevent the finished quilt from looking lopsided.
-
T-Shirt Style Memory Quilt
A t-shirt layout features large, centered rectangular panels that preserve the full text and character designs from baby tops and graphic onesies. Because graphic prints vary in scale, you can frame smaller graphics with cotton sashing strips to bring all blocks to uniform dimensions.
Requirements: 15 to 20 graphic clothing panels, fusible stabilizer, and all-purpose sewing thread.
Expert Tip: Use a clear acrylic square ruler to center graphics precisely before slicing edges with your rotary cutter.
-
I-Spy Baby Memory Quilt
The I-Spy design centers on fabrics covered with animals, vehicles, toys, and distinct everyday objects. It creates an engaging visual game where children spot specific items within individual quilt squares.
Requirements: 20 to 30 printed baby garments offering high visual variety, lightweight interlining, and 45 in x 60 in (114 cm x 152 cm) batting.
Expert Tip: Fussy-cut single motifs so each square features one complete animal or object without cutting through the center of the illustration.
-
Strip-Pieced Memory Quilt
Strip piecing joins long fabric strips cut from larger items such as receiving blankets, swaddles, and footed sleepers. Sewing strips together in continuous vertical or diagonal rows minimizes seam intersections and speeds up overall construction time.
Requirements: 15 to 25 mixed baby clothing items, a long quilting ruler, and ballpoint machine needles (size 75/11 or 80/12).
Expert Tip: Alternate your sewing direction from strip to strip (sewing top-to-bottom on the first seam, then bottom-to-top on the next) to prevent the quilt top from bowing.
Unique Texture and Design Memory Quilt Concepts
Expanding beyond flat cotton patchwork allows you to incorporate tactile elements like pockets, frayed raw edges, and dimensional details. These four concepts take advantage of original garment shapes to add physical texture to your quilt top.
-
Memory Quilt with Pockets
This design incorporates functional structural elements from clothing, such as overall bib pockets, small beanie hats, and baby socks stitched directly onto stabilized background squares. The result provides three-dimensional tactile interest across the blanket surface.
Requirements: Baby garments with functional pockets, beanies, baby socks, fusible interlining, and fabric clips.
Expert Tip: Edge-stitch pockets and socks with a narrow 1/8 inch (3 mm) seam allowance using a stretch needle, reinforcing the upper corners with double backstitches.
-
Rag Quilt with Flannel
A rag quilt exposes raw seam allowances on the exterior face of the blanket, which fray into soft tufts after washing. Making this style with flannel baby clothes and soft knit sleepers eliminates the need for separate edge binding.
Requirements: Flannel and knit garments, 45 in x 60 in (114 cm x 152 cm) batting squares, and sharp fabric scissors for clipping edges.
Expert Tip: Snip raw seam allowances every 1/4 inch (6 mm), taking care not to cut into the 1/2 inch (5.1 cm) structural seamline.
-
Sashiko or Visible Mending Quilt
This method combines geometric piecing with visible hand-stitching using heavy thread to secure layers and decorate plain blocks. It provides a structured way to reinforce worn knees or faint milk stains on well-loved clothing pieces.
Requirements: Interfaced knit squares, heavy cotton embroidery thread, hand-sewing needle, and safety pins for basting.
Expert Tip: Mark running stitch lines with a water-soluble fabric pen before stitching to ensure even, straight decorative lines.
-
Hexagon English Paper Piecing Quilt
English paper piecing (EPP) wraps tiny fabric scraps around paper hexagon templates before joining them with tight whipstitches by hand. It allows you to use odd-shaped remnants from newborn hats and infant sleeves that are too small for standard machine cutting.
Requirements: Small fabric scraps, paper hexagon templates, hand-sewing needle, thread, and fusible stabilizer.
Expert Tip: Press wrapped paper pieces thoroughly with a dry iron to create crisp folds before joining units together.
Special Keepsake and Display Quilt Styles
Preserving milestone memories sometimes calls for specialized decorative formats tailored for nursery walls or heirloom storage. These display-oriented styles focus on recording personal information and creating functional presentation pieces.
-
Embroidered Birth Details Quilt
This project features a prominent, solid-colored center block stitched with baby birth details, such as name, date, birth weight, and length. Surrounding patchwork rows made from 15 to 30 baby outfits frame the focal block.
Requirements: 1 solid cotton or interlock block for embroidery, stabilized knit patchwork squares, and 1 to 2 yards (0.9 to 1.8 m) backing fabric.
Expert Tip: Stitch all embroidery on the center block before joining it to surrounding patchwork rows to ensure the fabric stays flat in the hoop.
-
Miniature Wall Hanging Memory Quilt
A miniature wall hanging uses a smaller selection of favorite newborn outfits scaled down into tight, clean patchwork. Adding a fabric hanging sleeve across the top back edge makes it easy to mount the finished piece on a nursery wall rod.
Requirements: 8 to 15 baby garments, batting, backing fabric, and 1/2 yard (0.5 m) binding fabric.
Expert Tip: Cut a 3-inch (7.6 cm) wide strip of backing fabric to fold and secure under the top binding as an integrated hanging rod channel.
-
Double-Sided Receiving Blanket Quilt
A double-sided quilt uses pieced baby clothes on the top face and incorporates full-sized flannel receiving blankets pieced together for the backing. This construction makes both sides of the quilt meaningful while reducing the need for new yardage.
Requirements: 15 to 30 baby clothing items, 4 to 6 cotton receiving blankets for the back, and 45 in x 60 in (114 cm x 152 cm) batting.
Expert Tip: Square up receiving blankets with a rotary cutter before sewing them into a backing sheet to keep the edges straight.
-
Shadow Box Framed Memory Display
This format arranges stabilized mini-quilt blocks or small garment sections inside a deep wooden shadow box frame. It keeps delicate fabric preserved behind glass, protecting outgrown keepsakes from everyday household wear.
Requirements: 5 to 10 milestone clothing pieces, lightweight interfacing, mounting board, and pins or hand-sewing thread.
Expert Tip: Secure fabric blocks to acid-free backing board with tiny hand tacking stitches instead of craft glues that degrade fibers over time.
Pro Tips for Sewing Your Baby Memory Quilt Faster
Completing an approx. 40 in x 50 in (102 cm x 127 cm) memory quilt in 6-10 hours requires an organized assembly system. These studio techniques streamline preparation, cutting, and piecing when handling stretchy children’s clothing.
- Stabilize full garment sections before cutting: Deconstruct onesies and sleepers along their existing side seams and cut away sleeves. Lay these flat fabric panels onto your ironing board, position fusible interlining on the wrong side, and press with a medium-heat dry iron using firm, downward pressure for 10-15 seconds per section.
- Batch-cut identical squares with acrylic rulers: Stack up to four stabilized fabric panels on your self-healing mat. Align a square acrylic quilting ruler over the panels and trim all four edges using a sharp 45 mm rotary cutter to produce uniform blocks in minutes.
Safety Note: Keep fingers at least 1 inch (2.5 cm) away from acrylic ruler edges and close the rotary cutter safety blade immediately after every cut.
- Chain-piece your rows continuously: Place blocks right sides together in pairs. Feed the pairs through your sewing machine using a standard 2.5 mm stitch length and a consistent 1/4 inch (6 mm) seam allowance without cutting the connecting thread between pairs.
- Press seam allowances in alternating directions: After chain-piecing blocks into rows, press row one seams to the right and row two seams to the left using your iron. When sewing rows together, these opposing seam folds nest tightly against each other, ensuring crisp block intersections.
- Layer and safety-pin baste before quilting: Lay your backing fabric right side down, smooth the 45 in x 60 in (114 cm x 152 cm) batting over it, and place your finished quilt top right side up. Secure the quilt sandwich with curved brass quilting safety pins placed every 4 to 5 inches (10 to 12 cm) across the surface to stop layers from shifting under the needle.
Frequently Asked Questions
How many baby clothes do I need for a 40×50 inch memory quilt?
You will need approximately 15 to 30 baby clothing items to produce an approx. 40 in x 50 in (102 cm x 127 cm) quilt top. Smaller sizes like newborn or 0-3 months yield fewer square inches of usable fabric, requiring closer to 30 pieces. Larger infant clothing in sizes 12-24 months provides broader flat panels, letting you complete the project with around 15 to 20 garments.
Do I need to use stabilizer on baby onesies and knit clothes?
Yes, applying fusible interlining or stabilizer is essential when quilting with baby onesies, jersey knits, and interlock cottons. Unstabilized knits stretch unevenly under machine presser feet, causing wavy seams and skewed blocks. Fusing a lightweight stabilizer to the reverse side gives knits the structural stability of standard woven quilting cotton.
What sewing machine needle is best for quilting baby knit clothes?
Install a ballpoint or stretch sewing machine needle in size 75/11 or 80/12 when piecing and quilting baby garments. Ballpoint needles feature a rounded tip that slides between knit fabric loops rather than piercing through fibers, preventing snags, runs, and skipped stitches along seamlines.
How do I wash and care for a finished baby memory quilt?
Machine wash the finished quilt in cold water on a gentle cycle using a mild, fragrance-free liquid detergent. Tumble dry on low heat or lay the blanket flat on clean towels to air-dry. Avoid high dryer heat, which can weaken fusible stabilizers or shrink mixed cotton-poly patches over time.
Transform Outgrown Clothing into a Cherished Keepsake
Creating a functional blanket preserves milestone garments that are too special to pack away in storage boxes. Using these 12 Baby Memory Quilt Ideas to Turn Old Clothes into Keepsakes, you have the methods needed to stabilize stretchy jersey knits, piece uniform blocks, and construct an approx. 40 in x 50 in (102 cm x 127 cm) memory blanket. Before sewing your first seam, take time to test your machine tension and needle on a scrap of stabilized onesie fabric to ensure balanced stitches throughout your project.